Account Signup
How to Sign up with DataMyth?
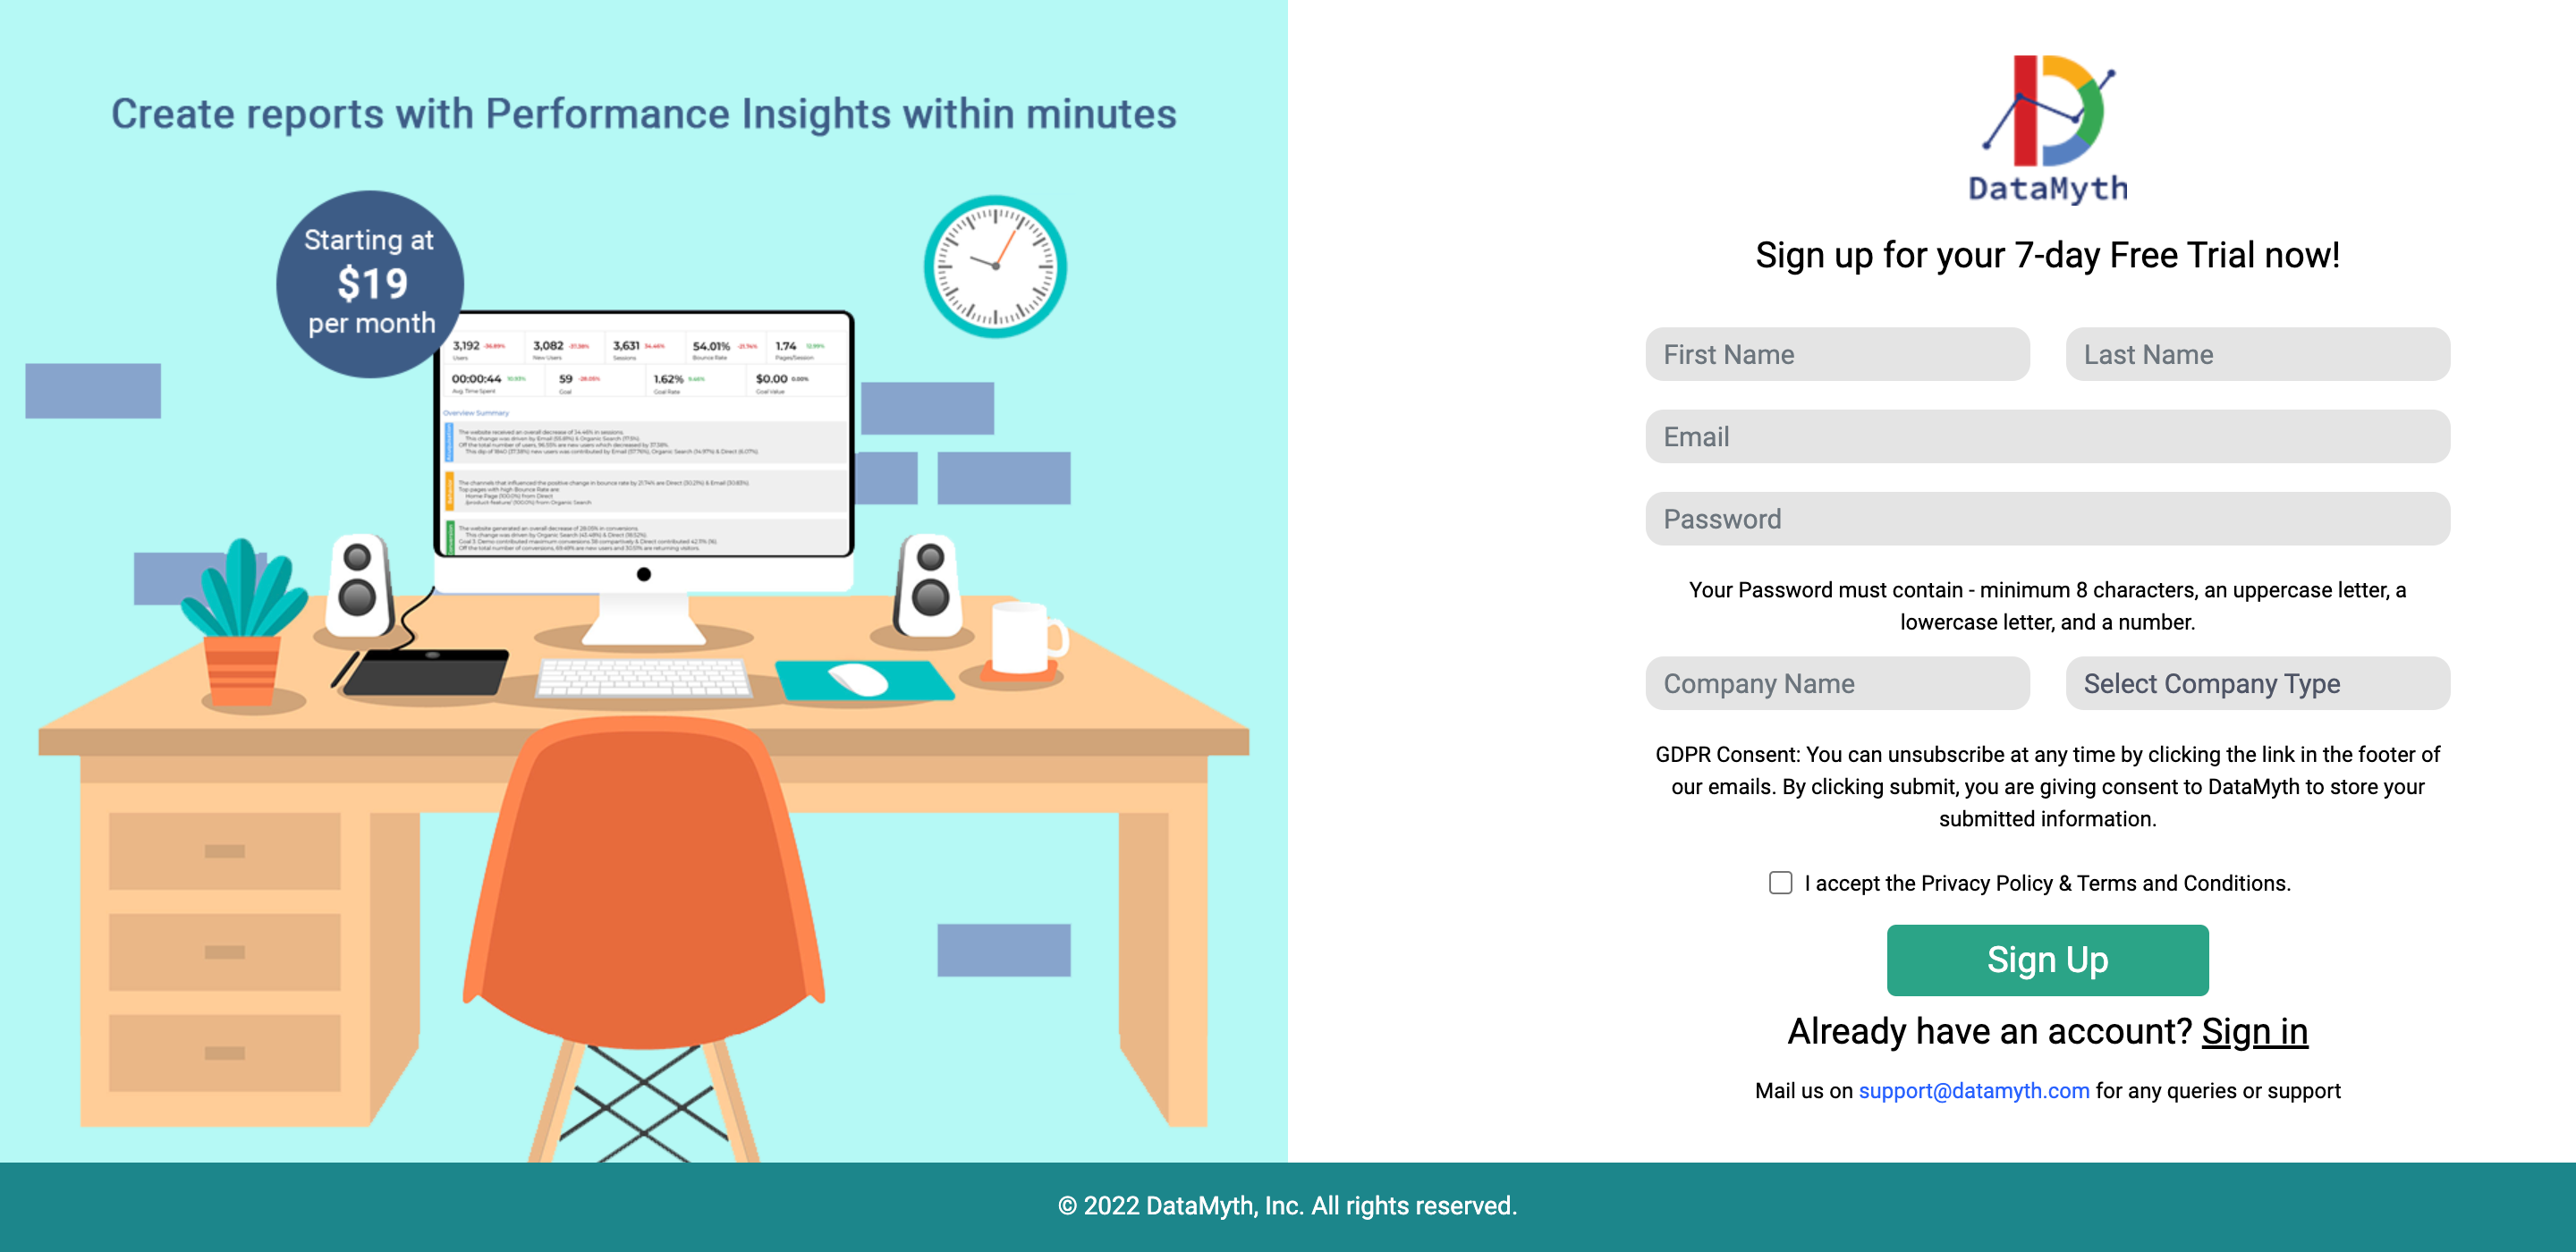
- Click the ‘Start Trial’ button on DataMyth’s website.
- Your trial account will be valid for 7 days.
- You will get access to all the features of the tool.
- After signing up, you can run your first report within a few minutes.

- On the sign up page, fill in the form with the requested details.
- Insert your ‘Name’ and ‘Email ID’.
- Do note, this is your email id that gives you access to your DataMyth account, and doesn’t need to be the one linked to your Channel accounts.
- Next, set a ‘Password’ and add your ‘Company Name’.
- Select the ‘Type of Company’. The options you have are ‘Freelancer’, ‘Agency’, and ‘In-House Team’.
- Accept the ‘Privacy Policy & Terms and Conditions’ and click the ‘Sign Up’ button.
- You will be taken to a Thank You page. Click the ‘Login Here’ text.
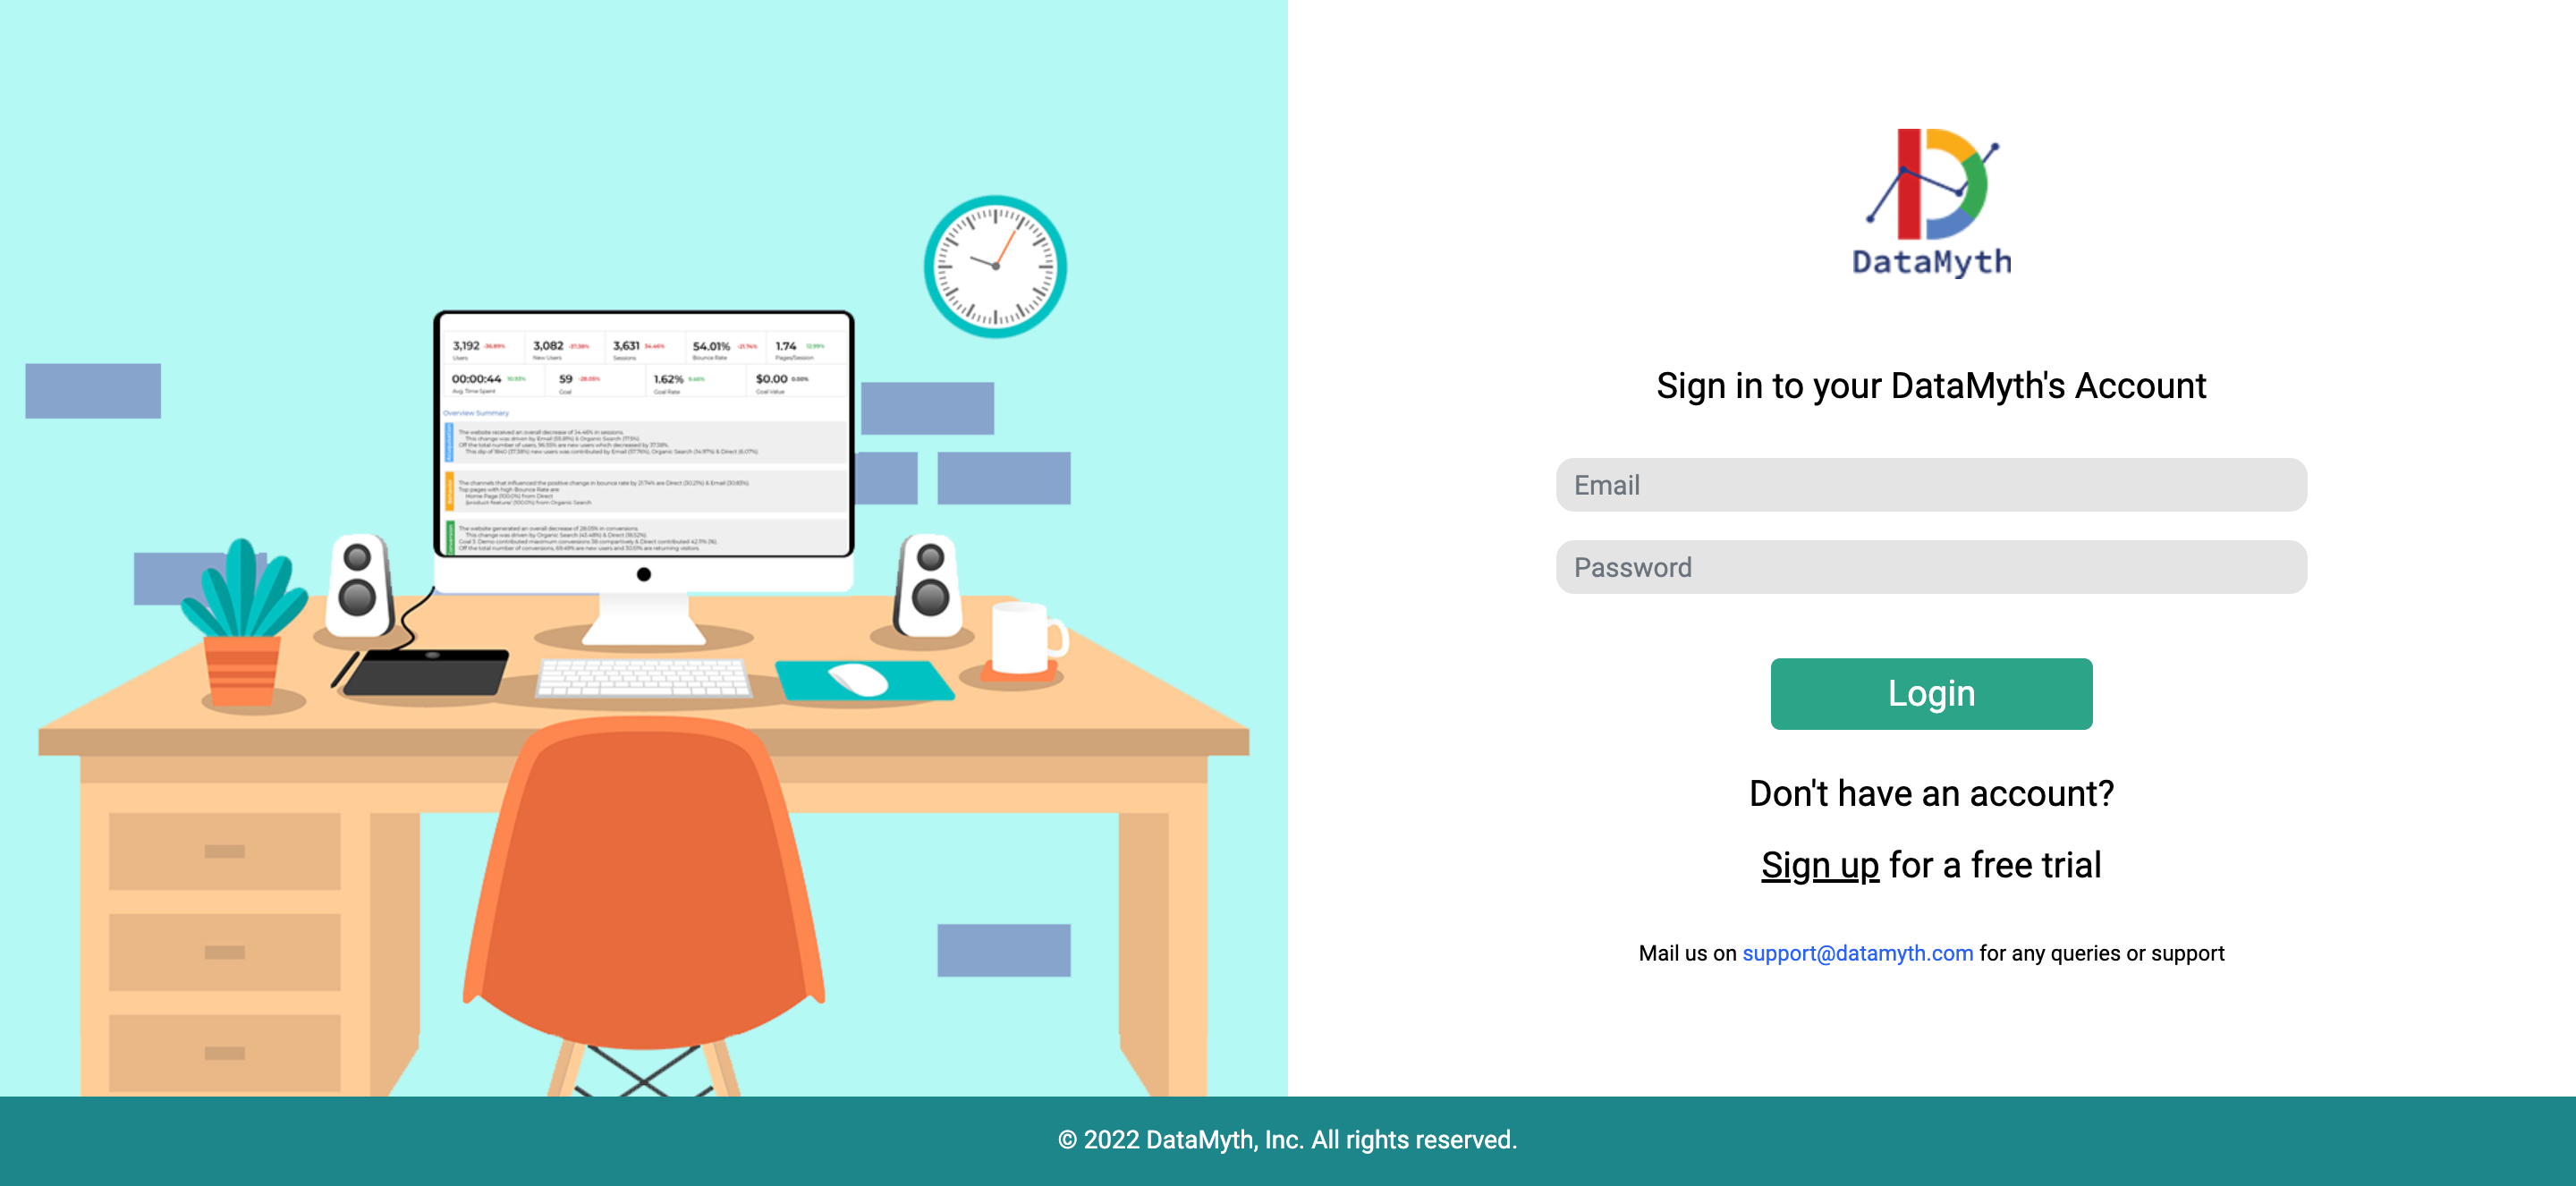
- Insert the ‘Email ID’ and ‘Password’ you created to login to your DataMyth account.
Create Client
How to ‘Create a Client’?
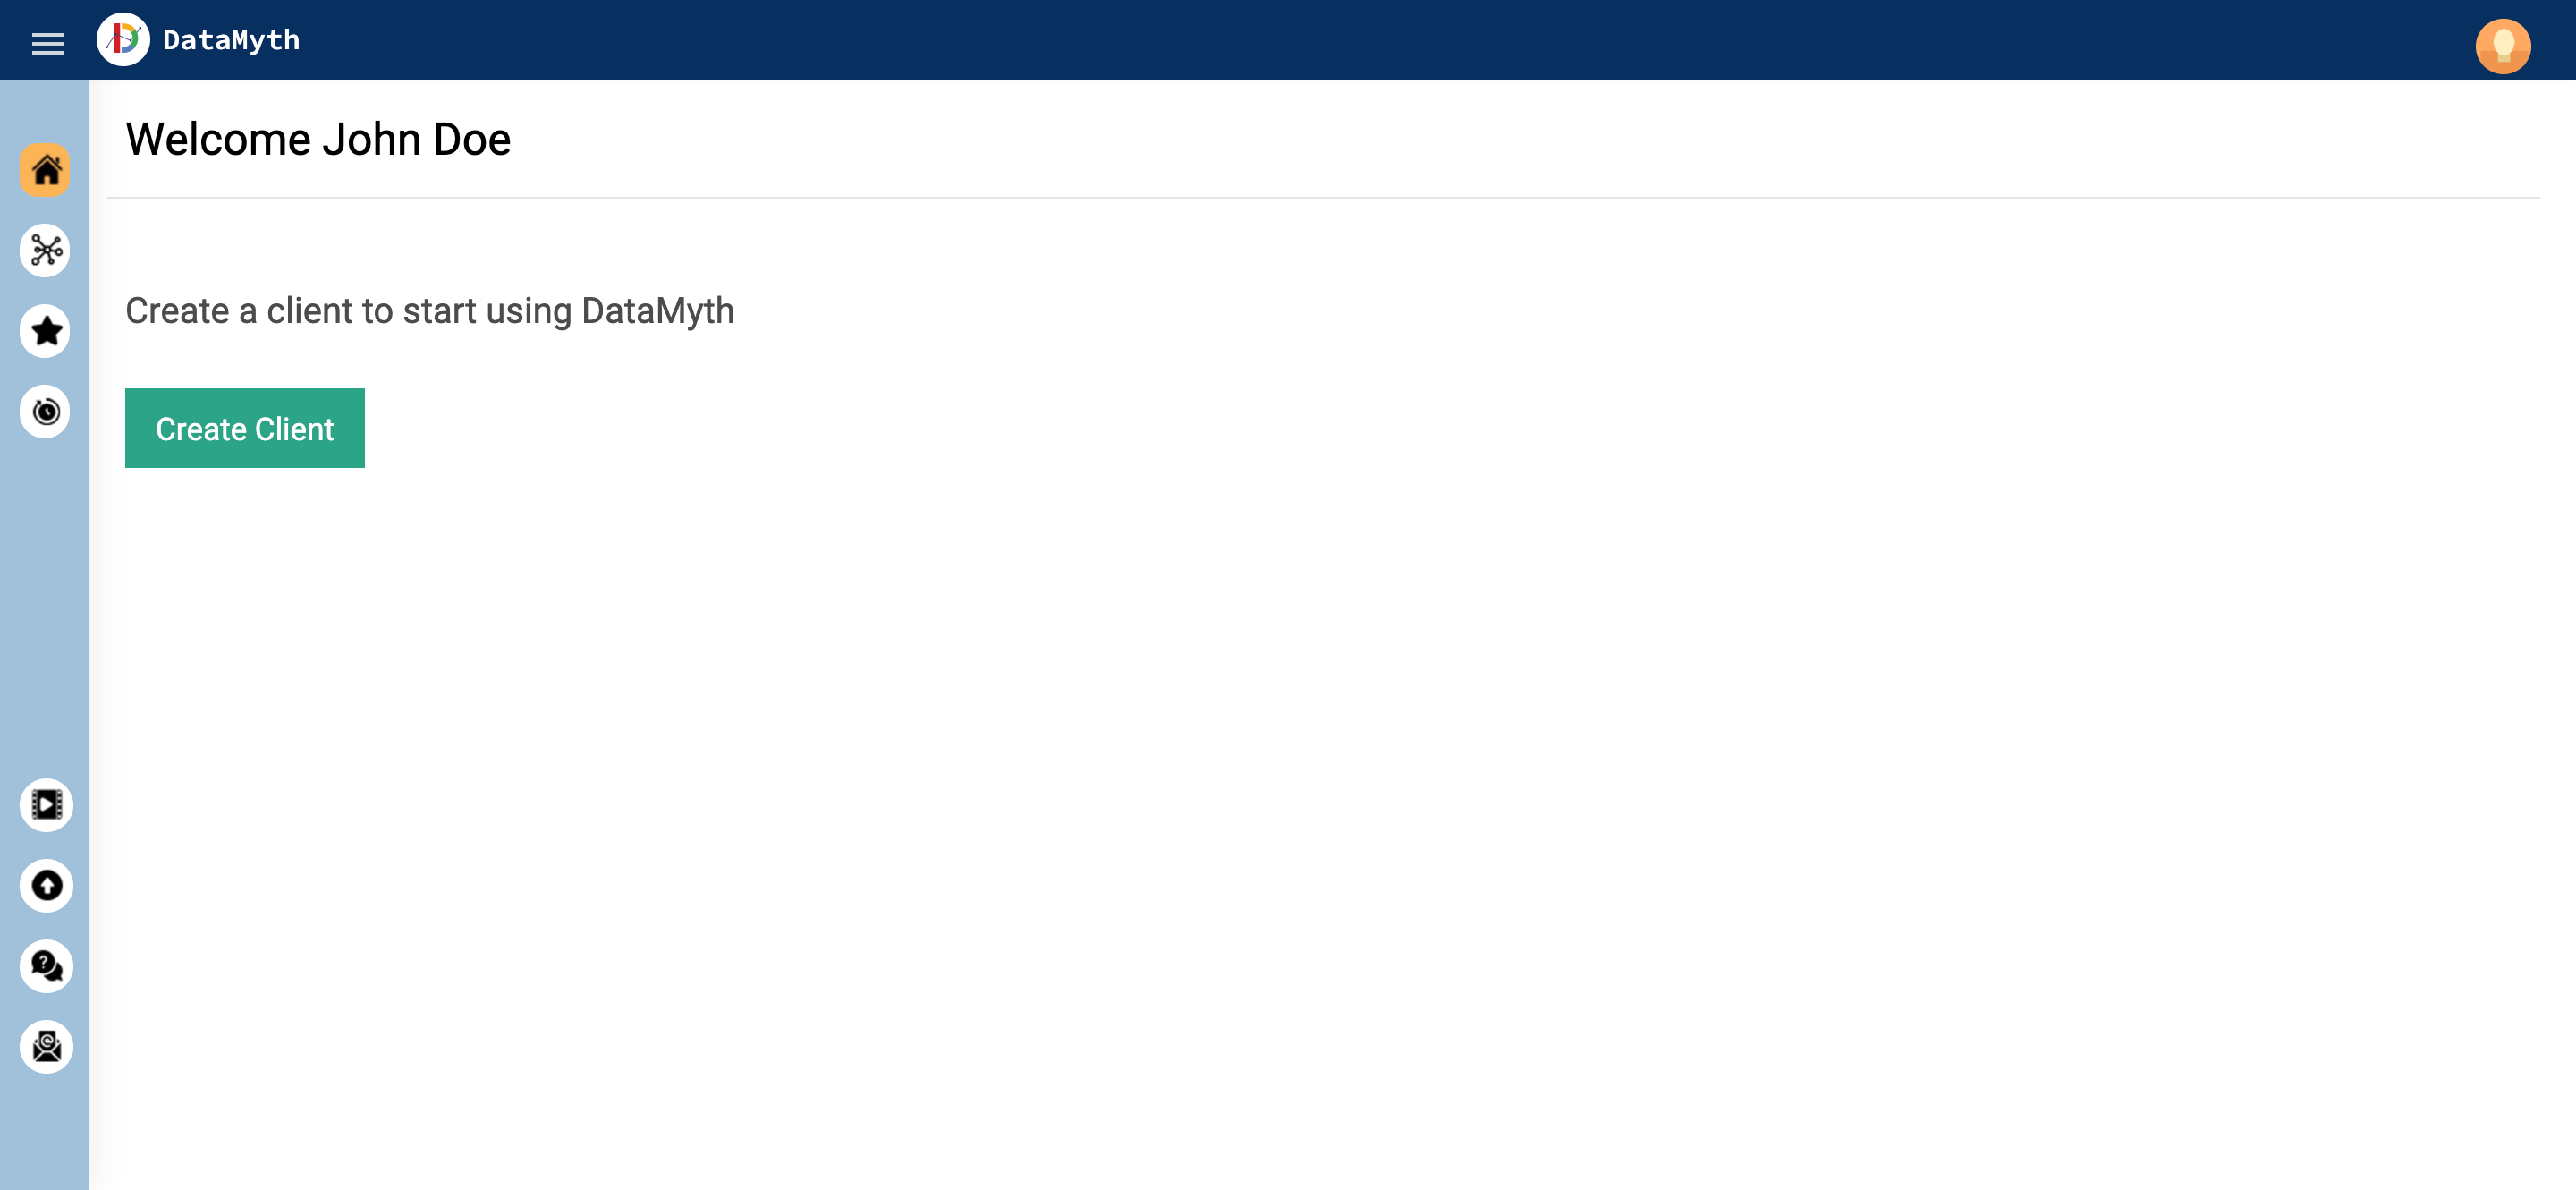
- Once logged into your DataMyth account, click the ‘Create Client’ button.
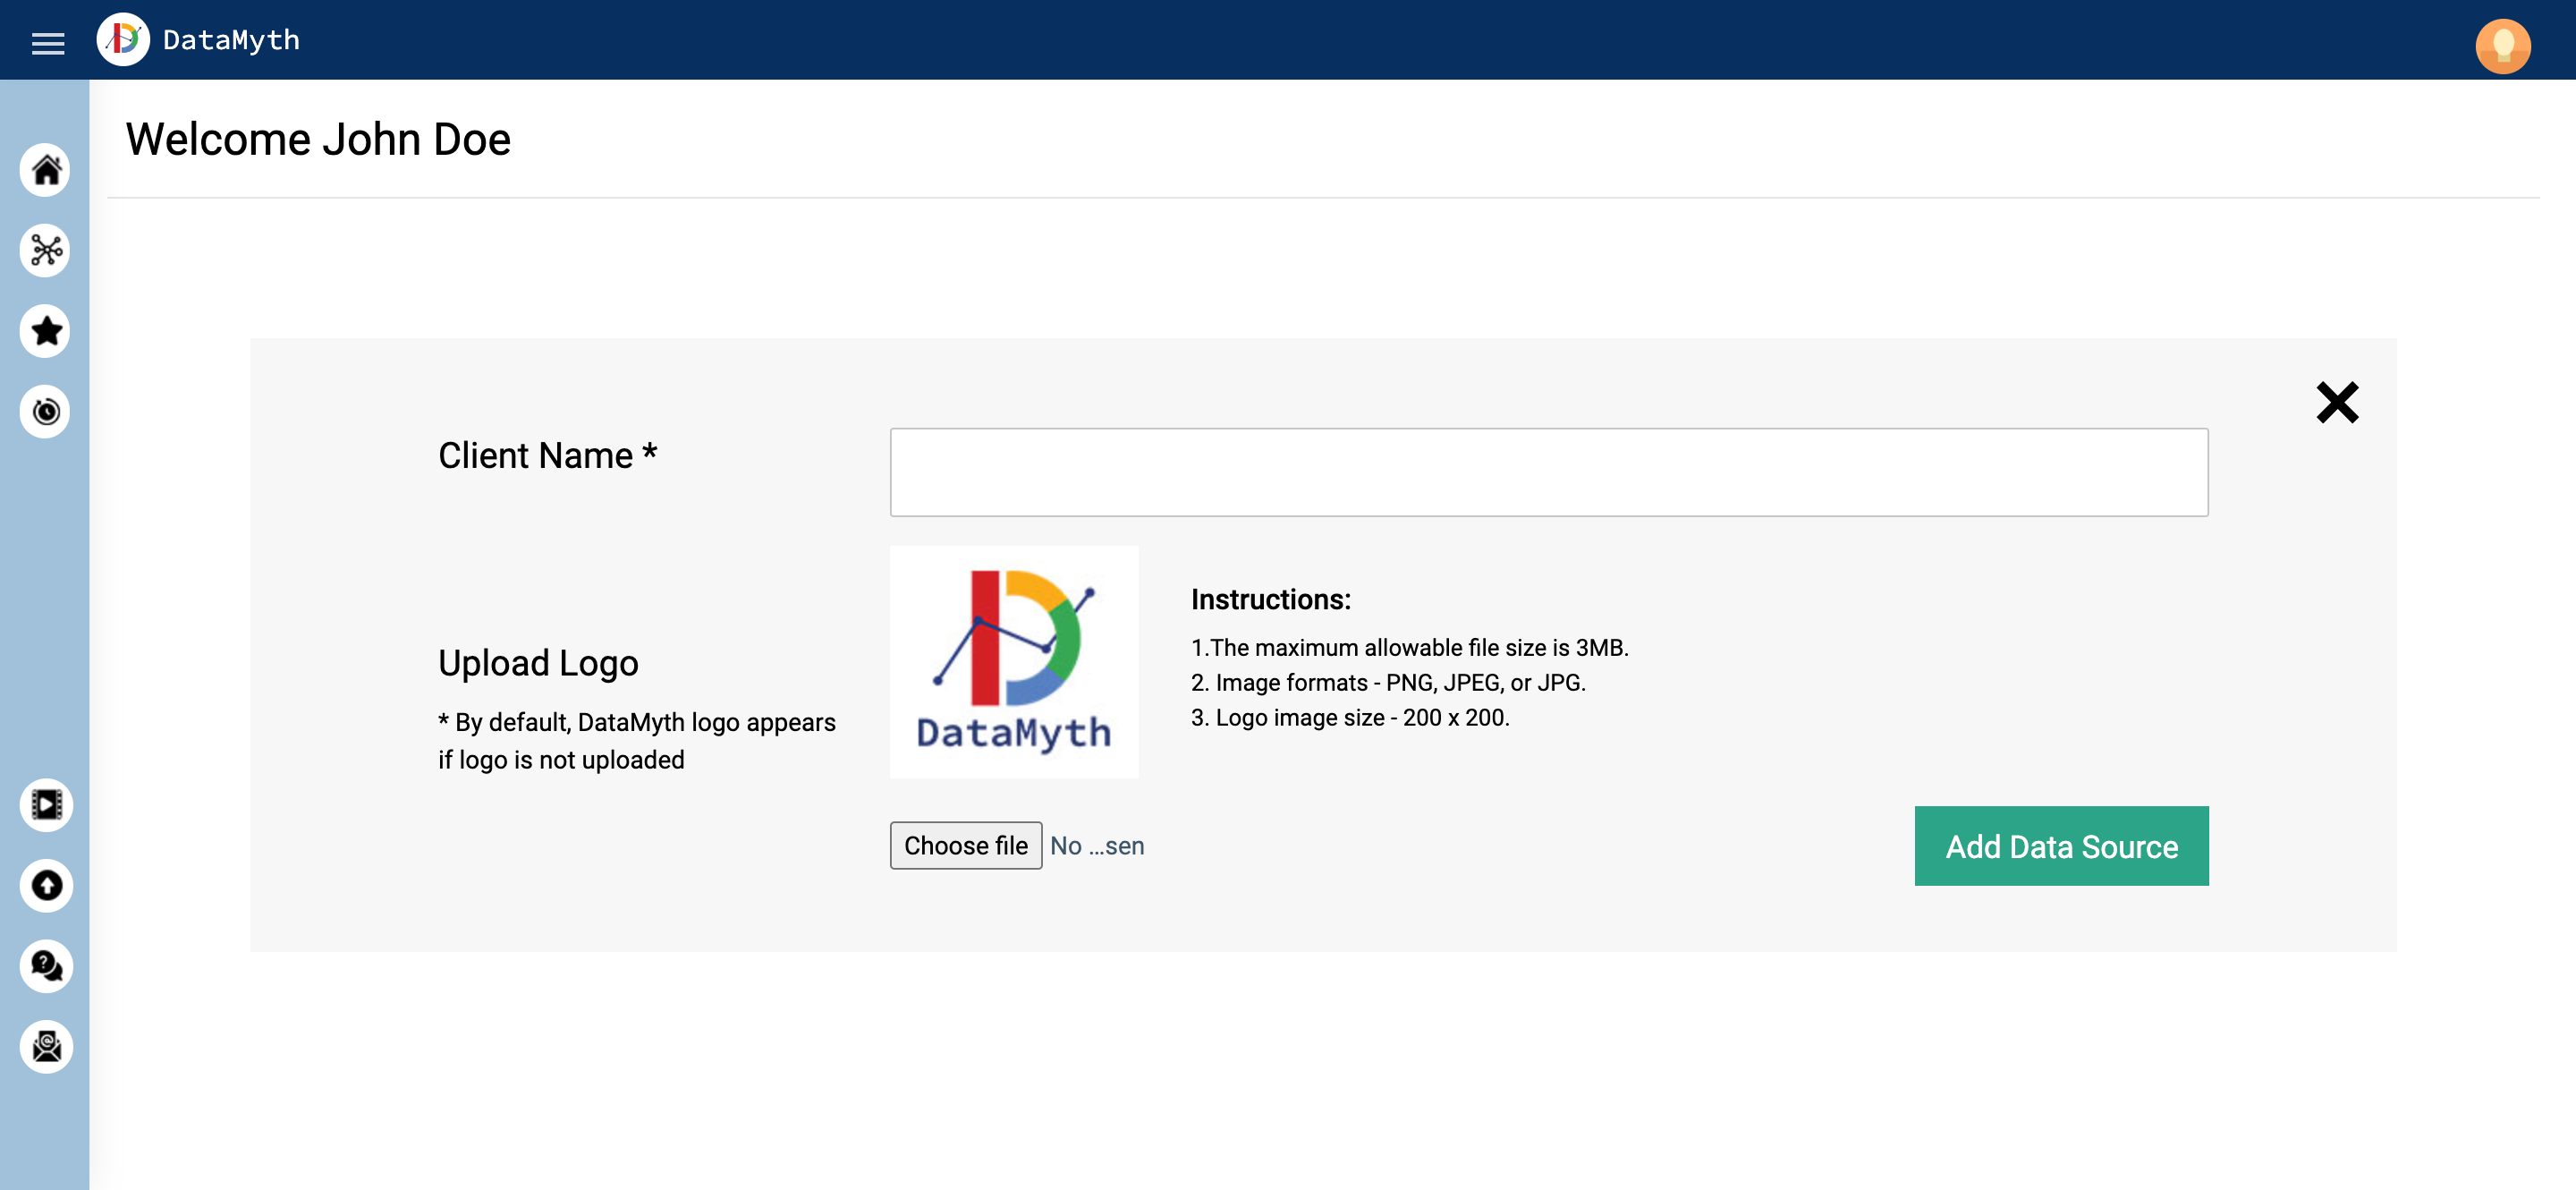
- On the ‘client creation’ page, add the name of the brand which will be known as ‘Client’ in DataMyth, and upload the client logo (size 200 x 200px). After adding the client details, click ‘Add Data Source’ button to link a channel to your client. A few things to note:
- As you add multiple clients to your account, your client name should be unique else the tool won’t accept the name.
- Your client logo will appear on the top left corner of the final report. Replace the existing DataMyth logo to activate the ‘Add Data Source’ button.
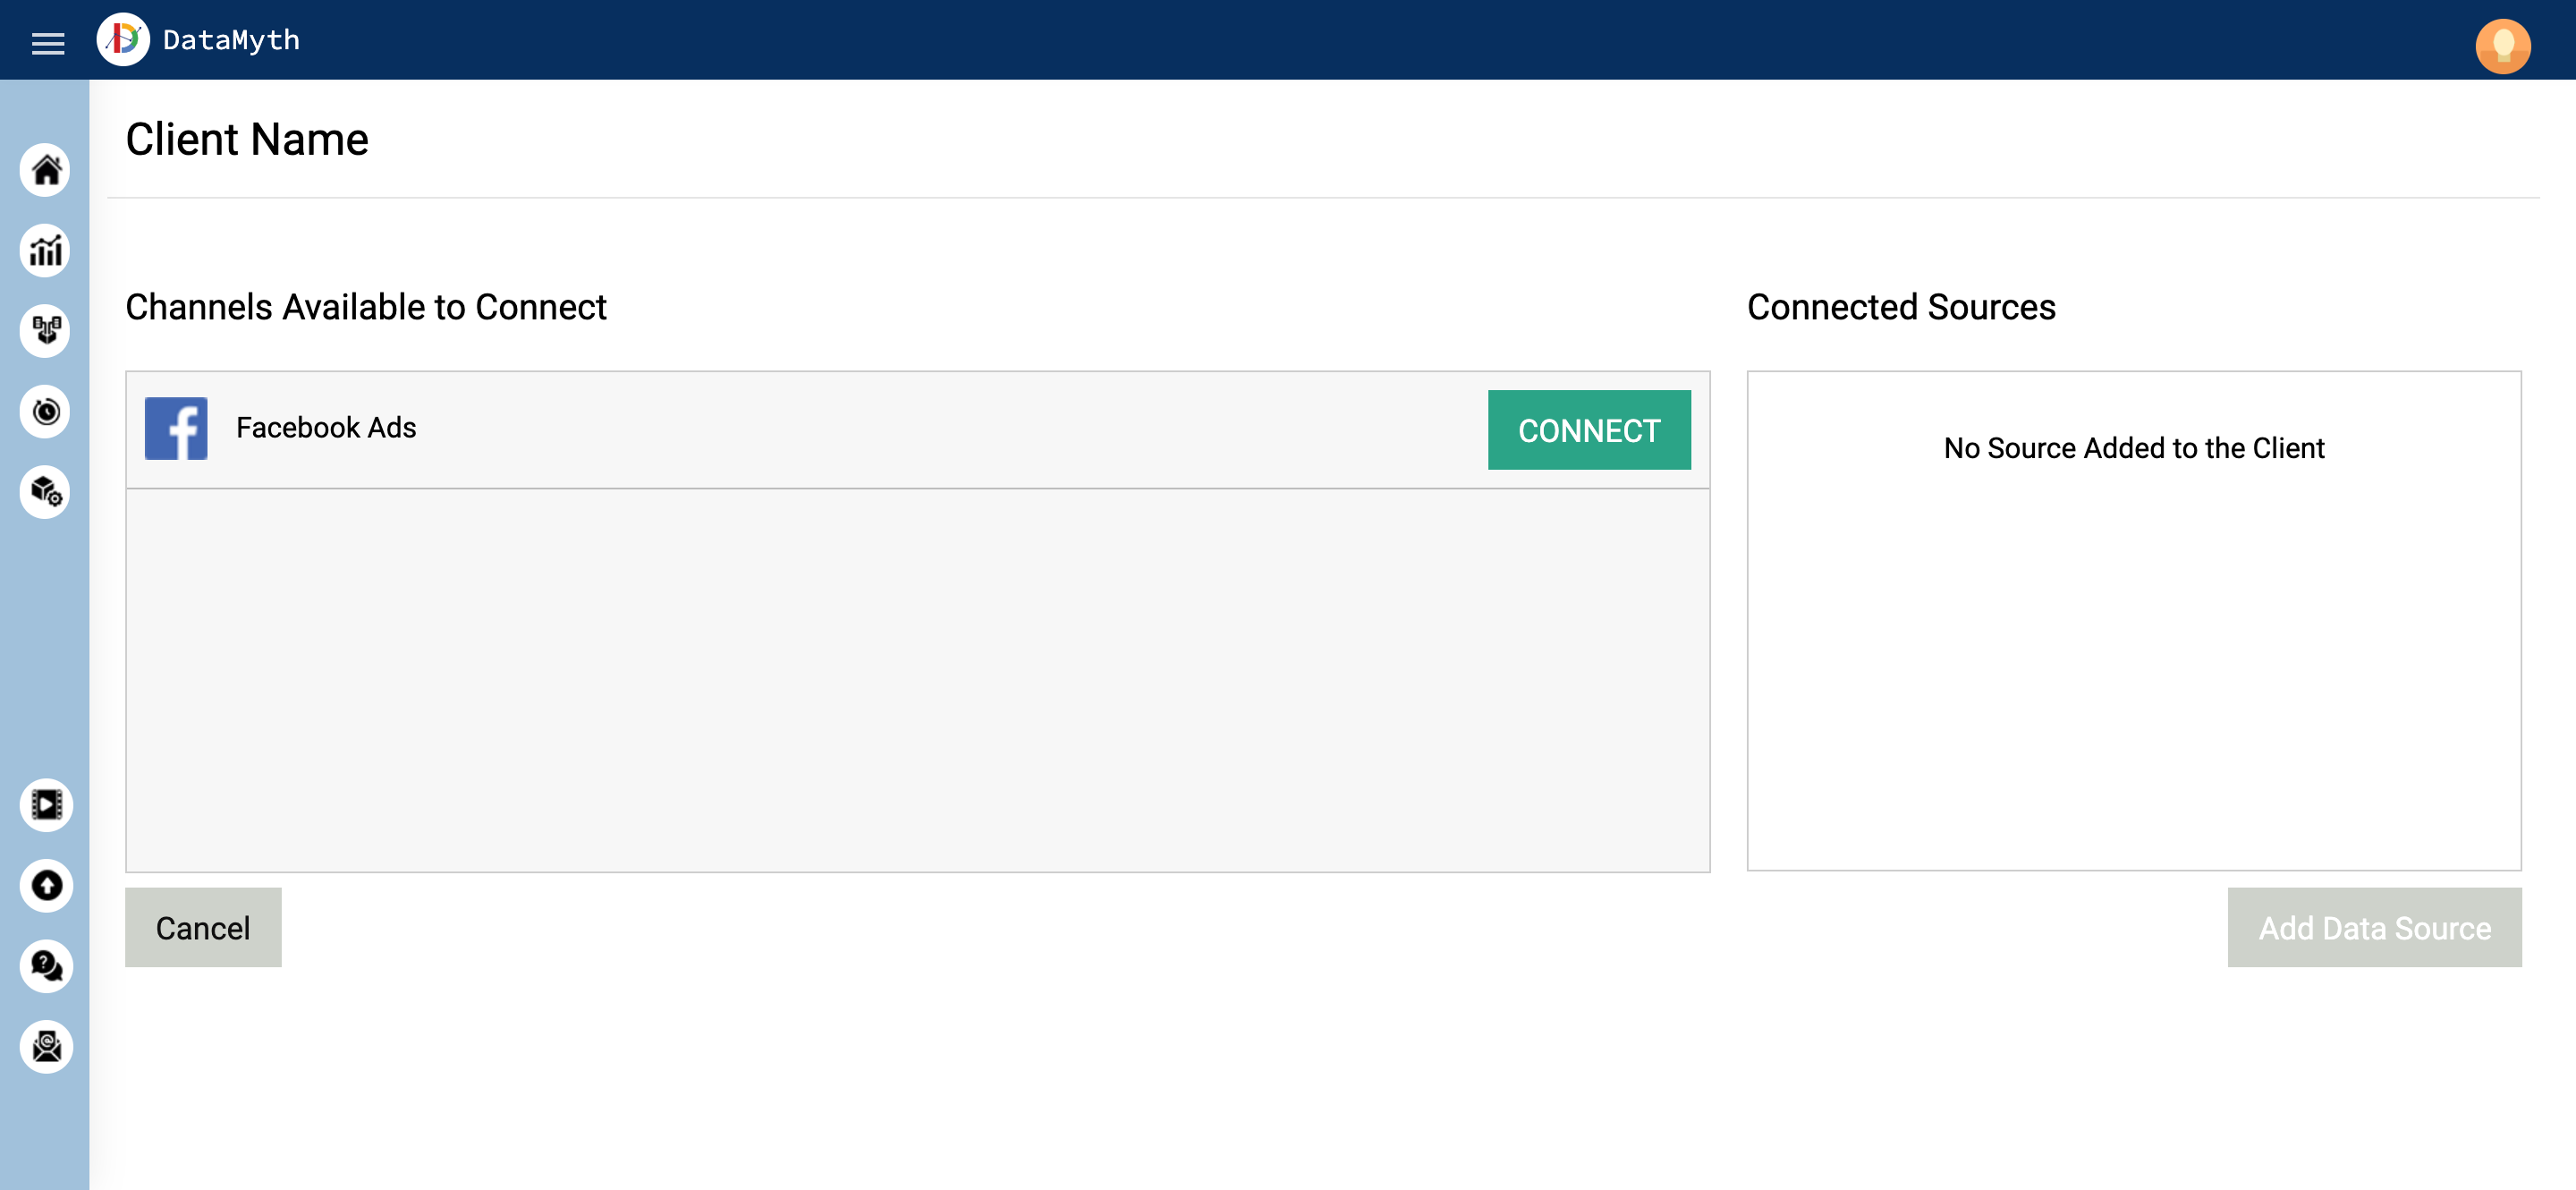
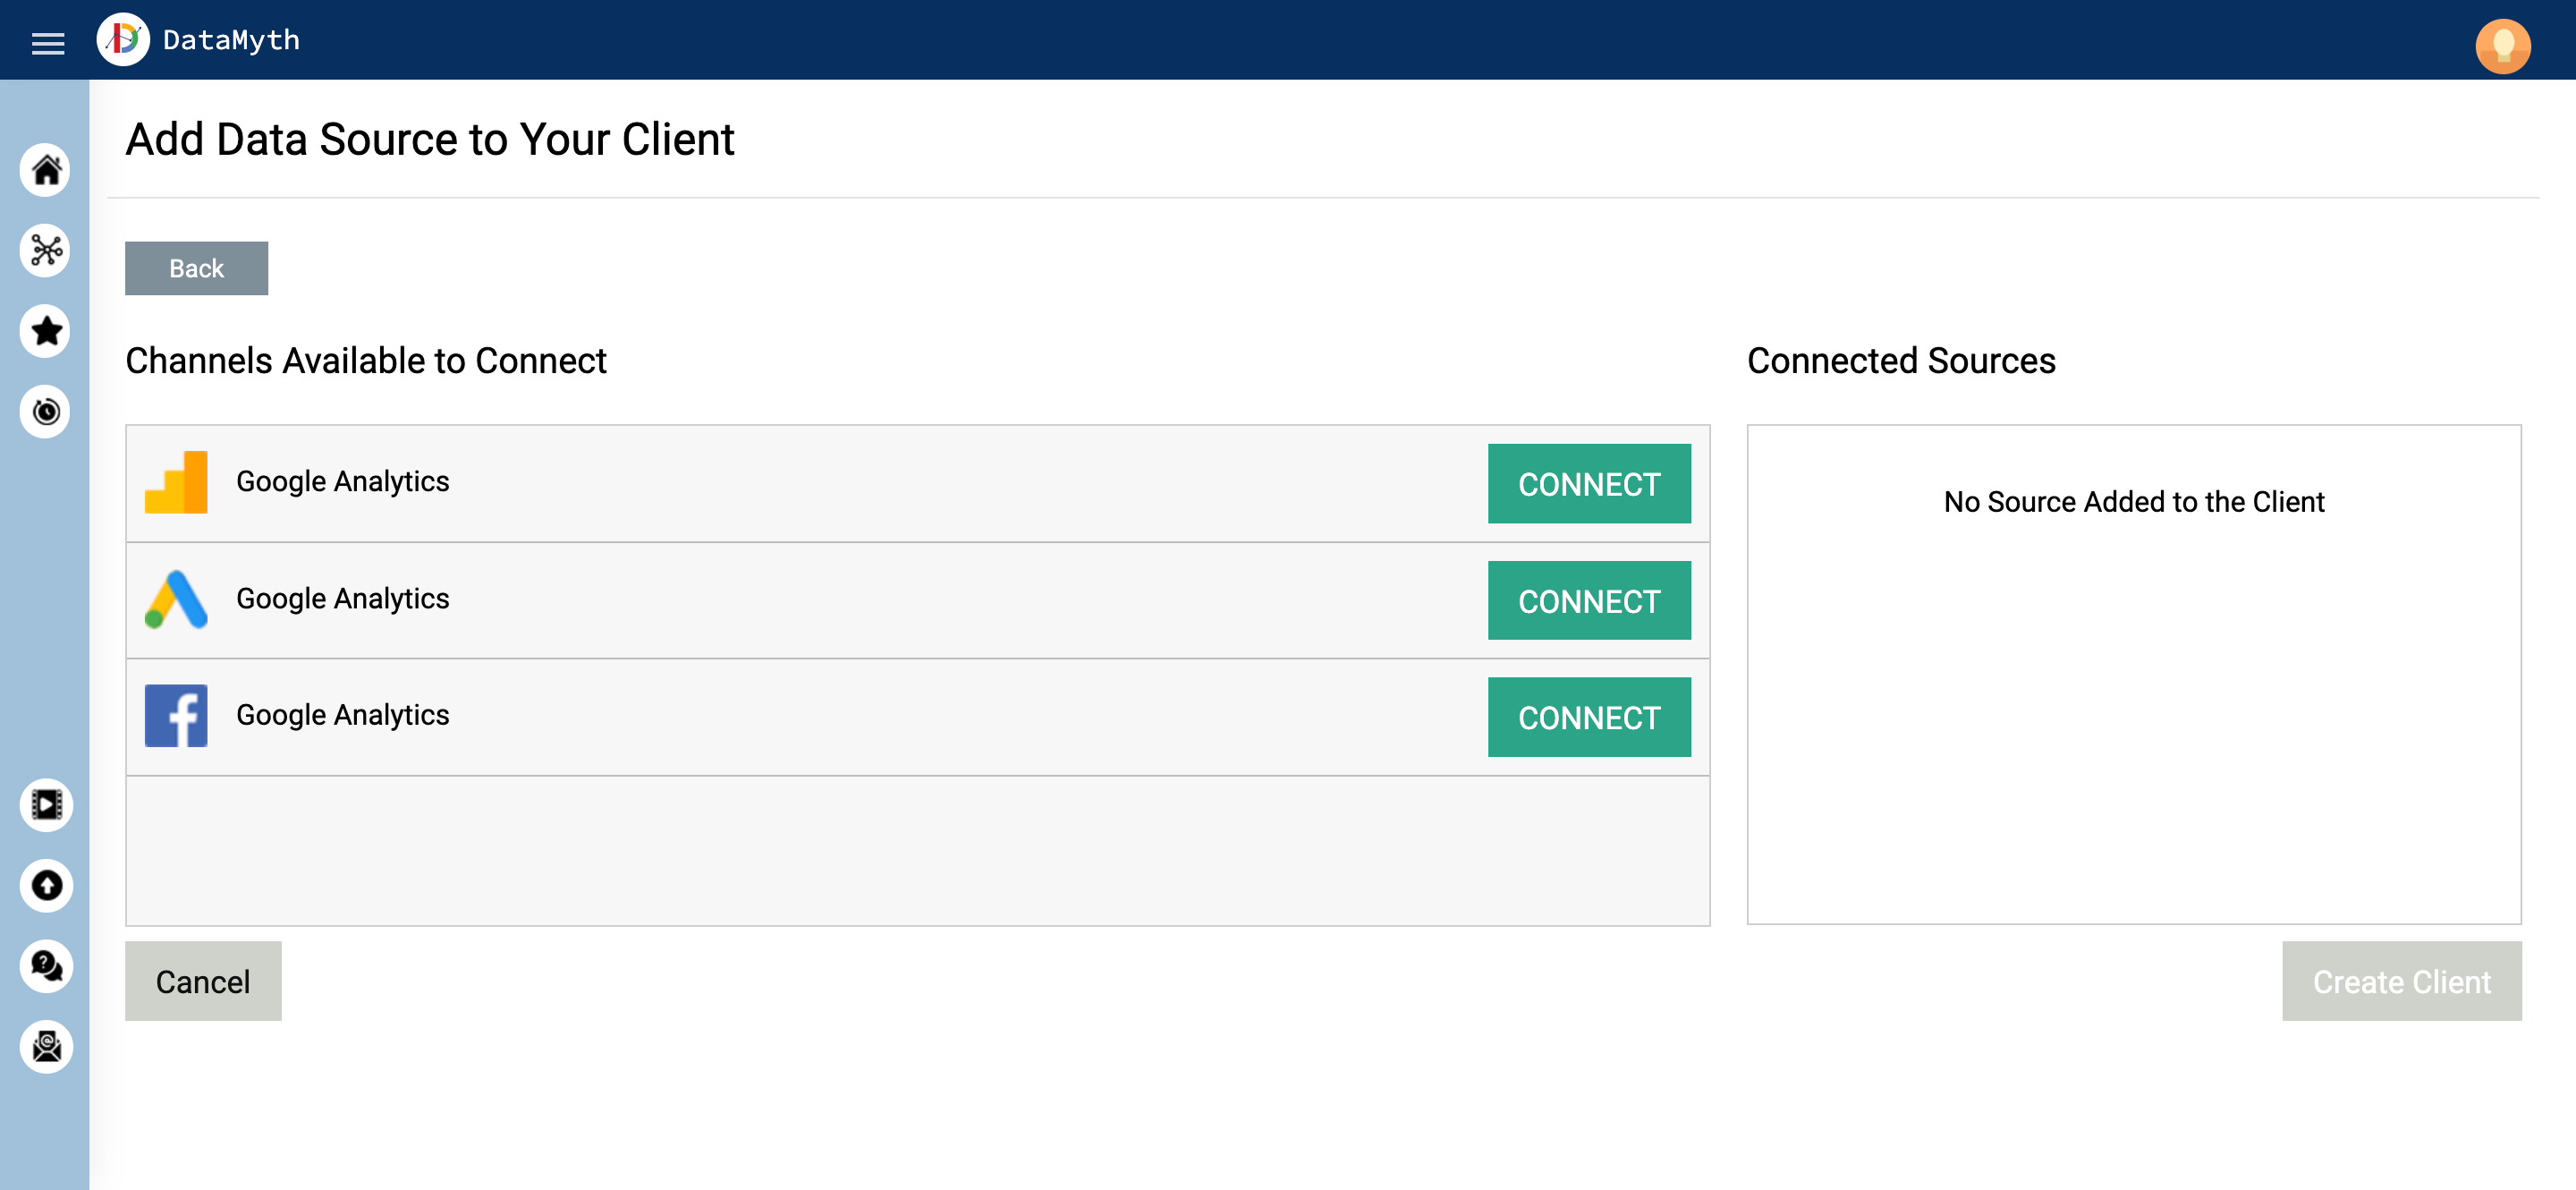
 The next step is to add your client channels. On the ‘Add Data Source’ page, you will see the list of channels you can connect with DataMyth. Click the ‘Connect’ button next to the channel you would like to connect.
- You will be taken to the oAuth page where you can select the account email ID that is linked to the Channel. If the email ID is not visible, click ‘Use another account’ and add the relevant email ID and password. If you have a 2-step authentication activated, accept the notification on your phone. Click ‘Allow’ to grant DataMyth all the required permissions.
- Please Note – DataMyth does not store your data, or make edits to your account. We need the permissions to run reports without any errors.

- If the email ID has been successfully added, you will see the list of Customer IDs/View IDs associated with that email on the ‘Add Data Source’ page. You can select the respective ID to add the channel to your client by clicking the ‘Add’ button.
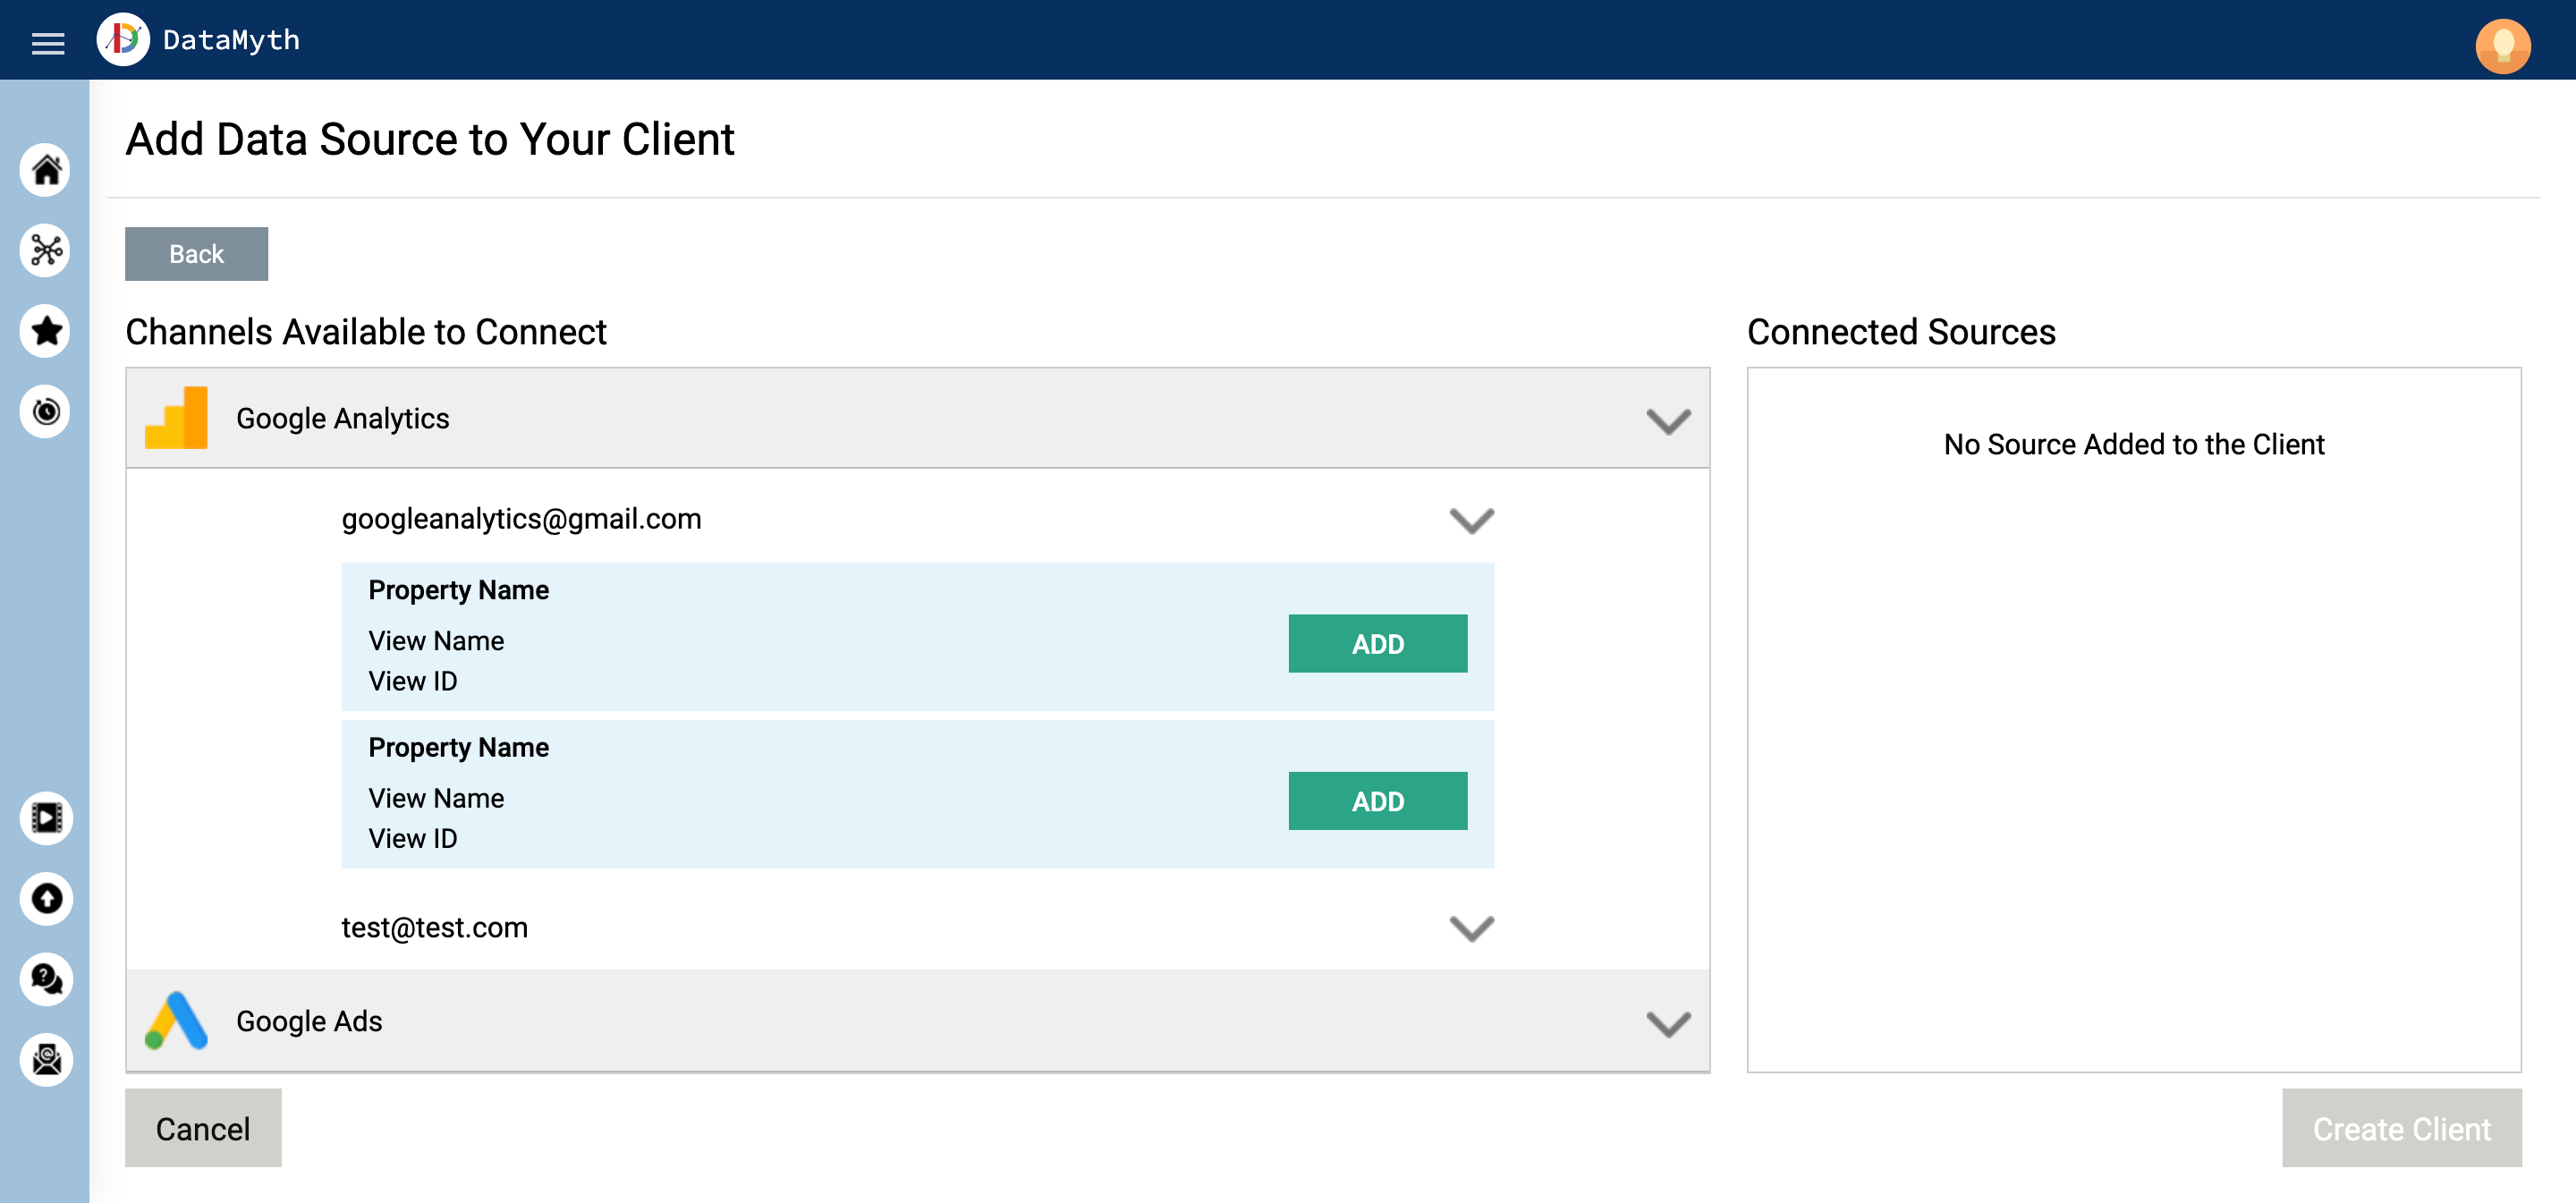
- Once the ID has been selected, complete the process to create your client by clicking the ‘Create Client’ button.

- Please Note:
- Your client will be created only once all the above steps are completed and a channel is linked. The client won’t be created if the process is abandoned at any stage, especially while adding a channel.
- Free Trial Accounts:
- You can add 1 client to your free trial account, and run unlimited reports.
- Once you add a client and run a report, you will not be able to add or replace the client.
Link Channel
Generate Report
How to ‘Generate a Report’?
- Once you login to your DataMyth account, and select your client name and you will be directed to the client’s ‘Reporting Page’.
- You will see the list of channels/reports added by you. Click the ‘Get Report’ button next to the respective channel you would like to run the report for.
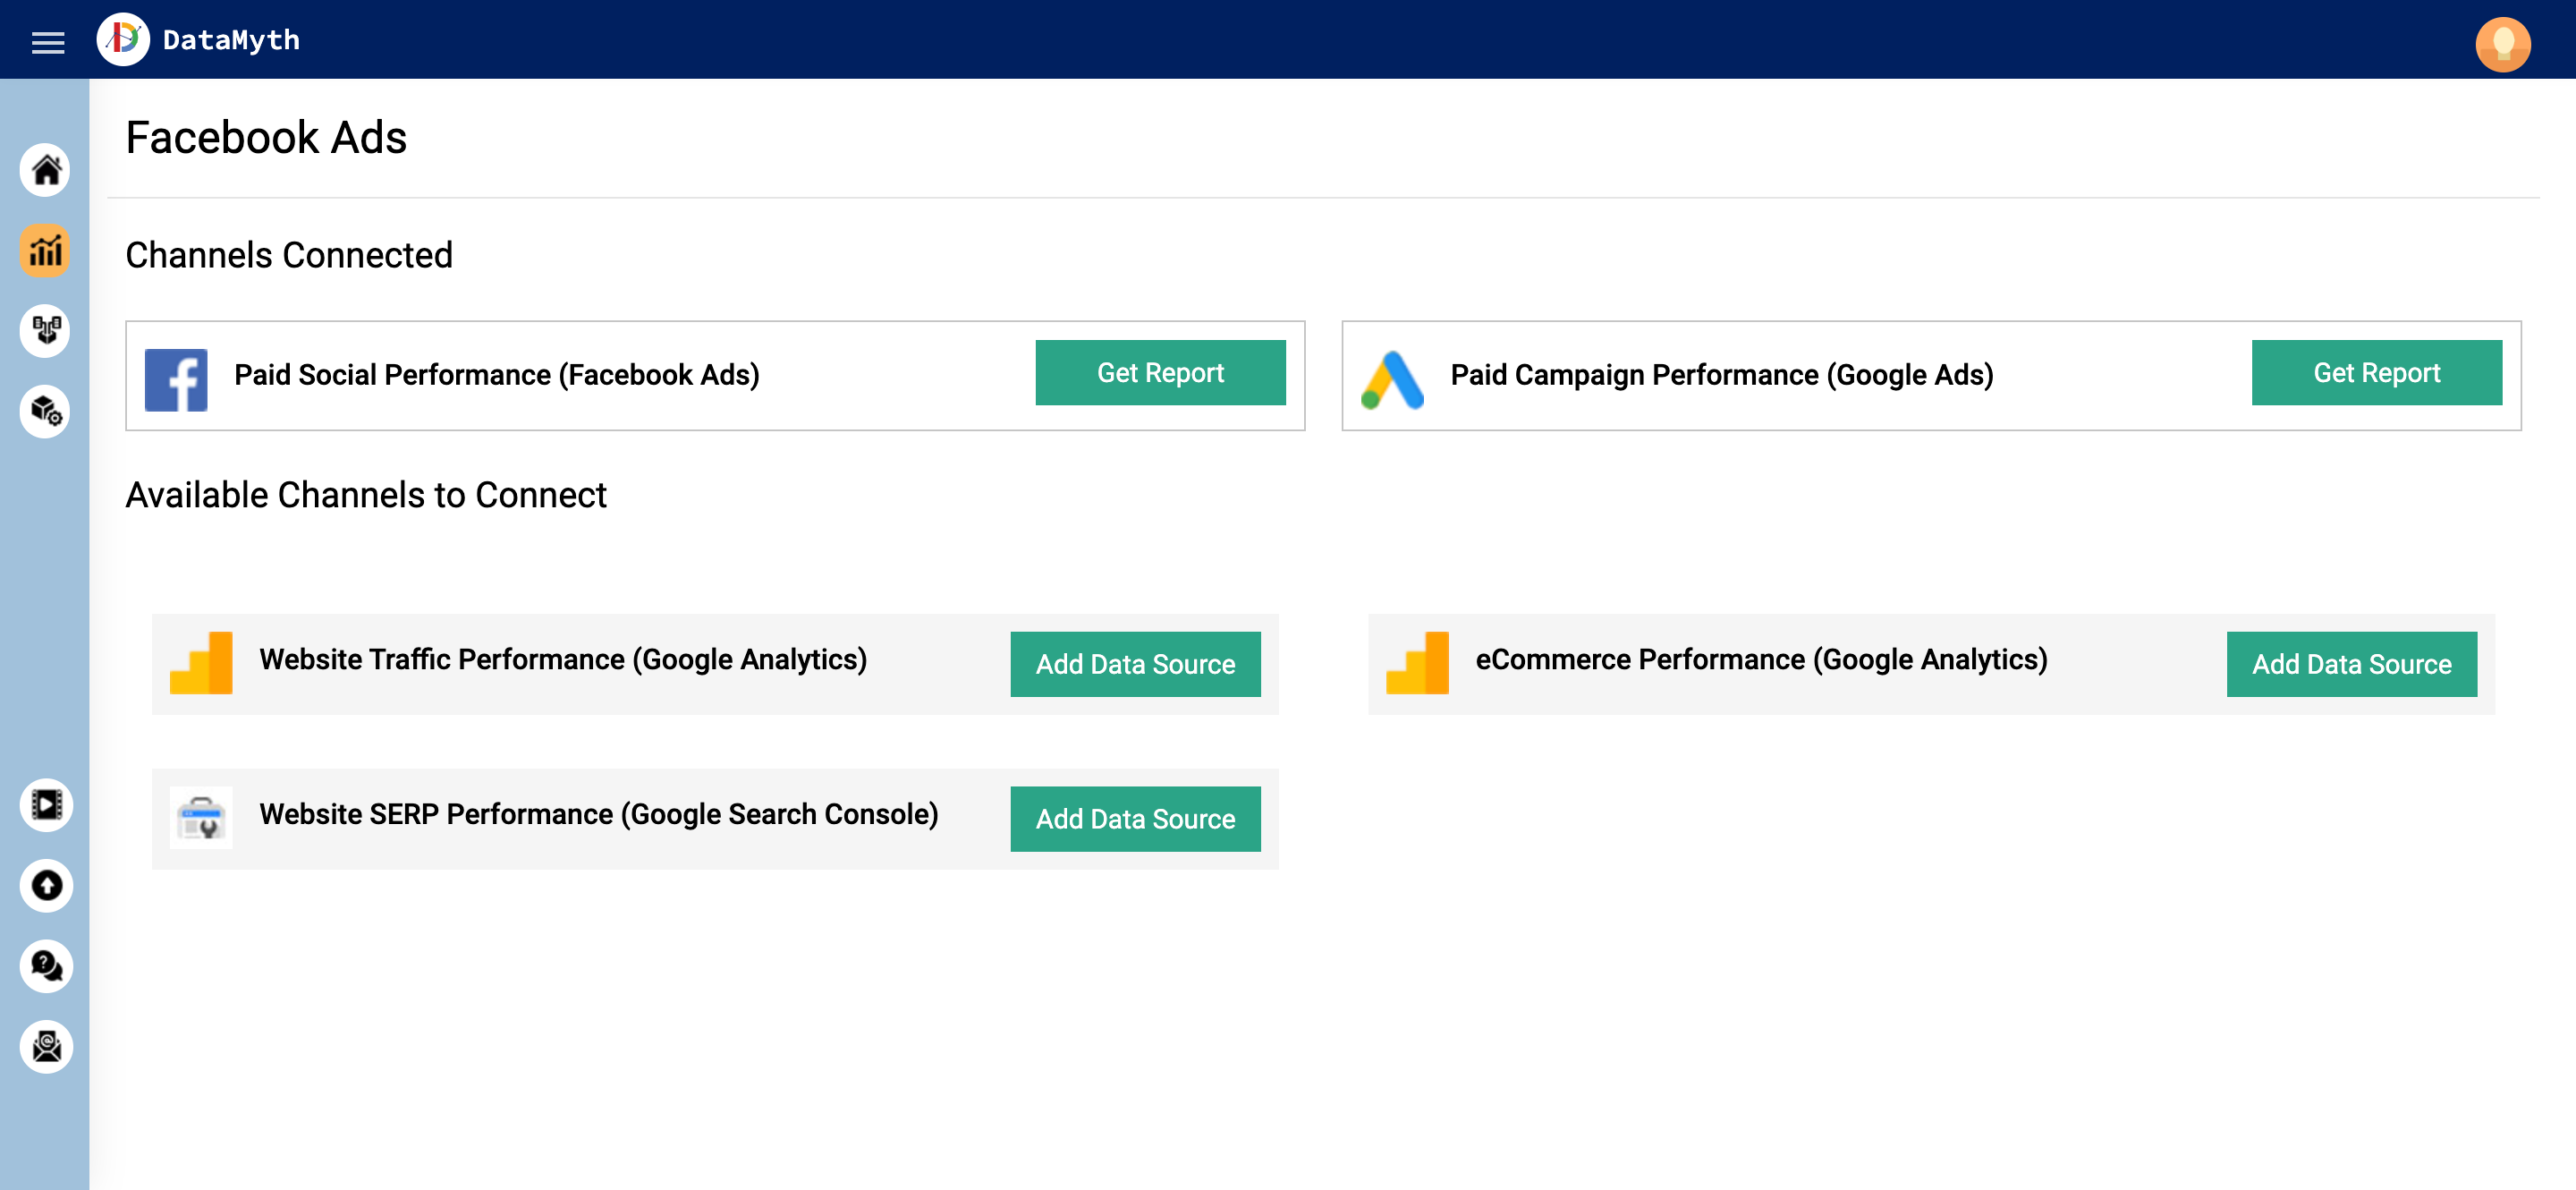
- For Google Ads, start by setting your target ‘Cost per Conversion’. Insights will be generated based on this input. If you do not have a goal, add $0.
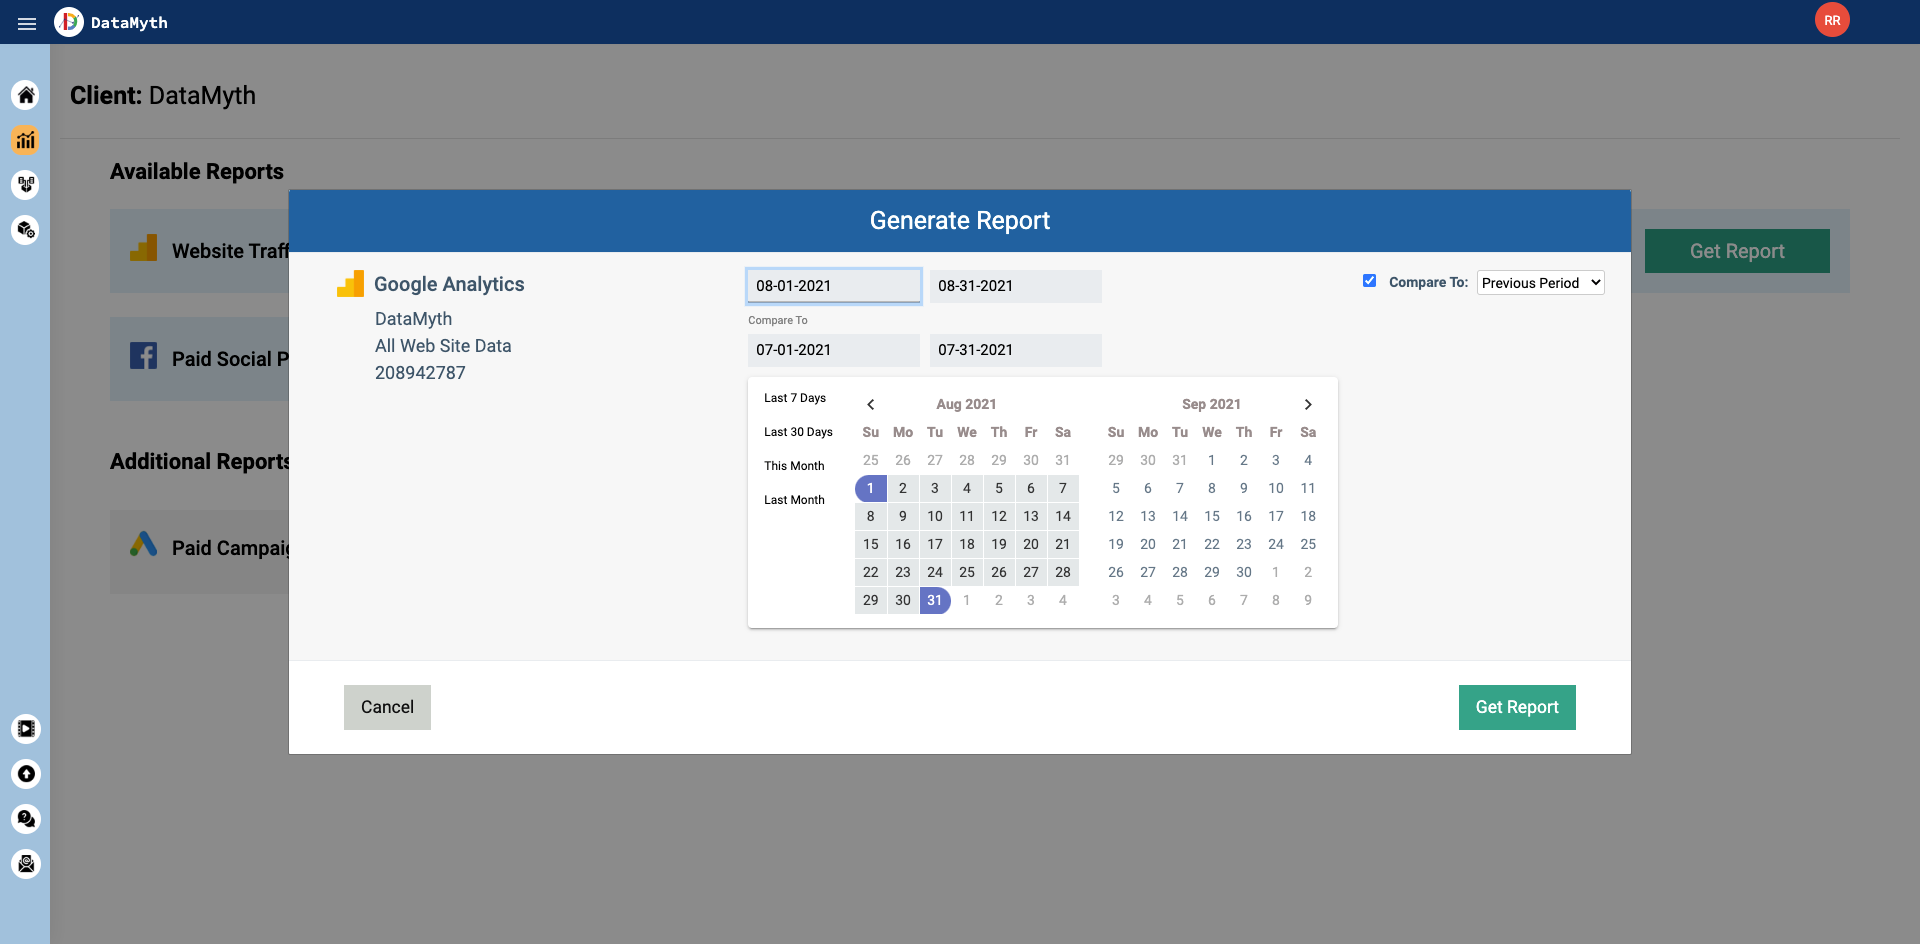
- Next, to run the report, select the date range like you would do in the Google Ads. Select the ‘Compare to’ option along with the time frame and hit ‘Get Report’. If you do not want to compare the performance, select the date range, and hit ‘Get Report’.
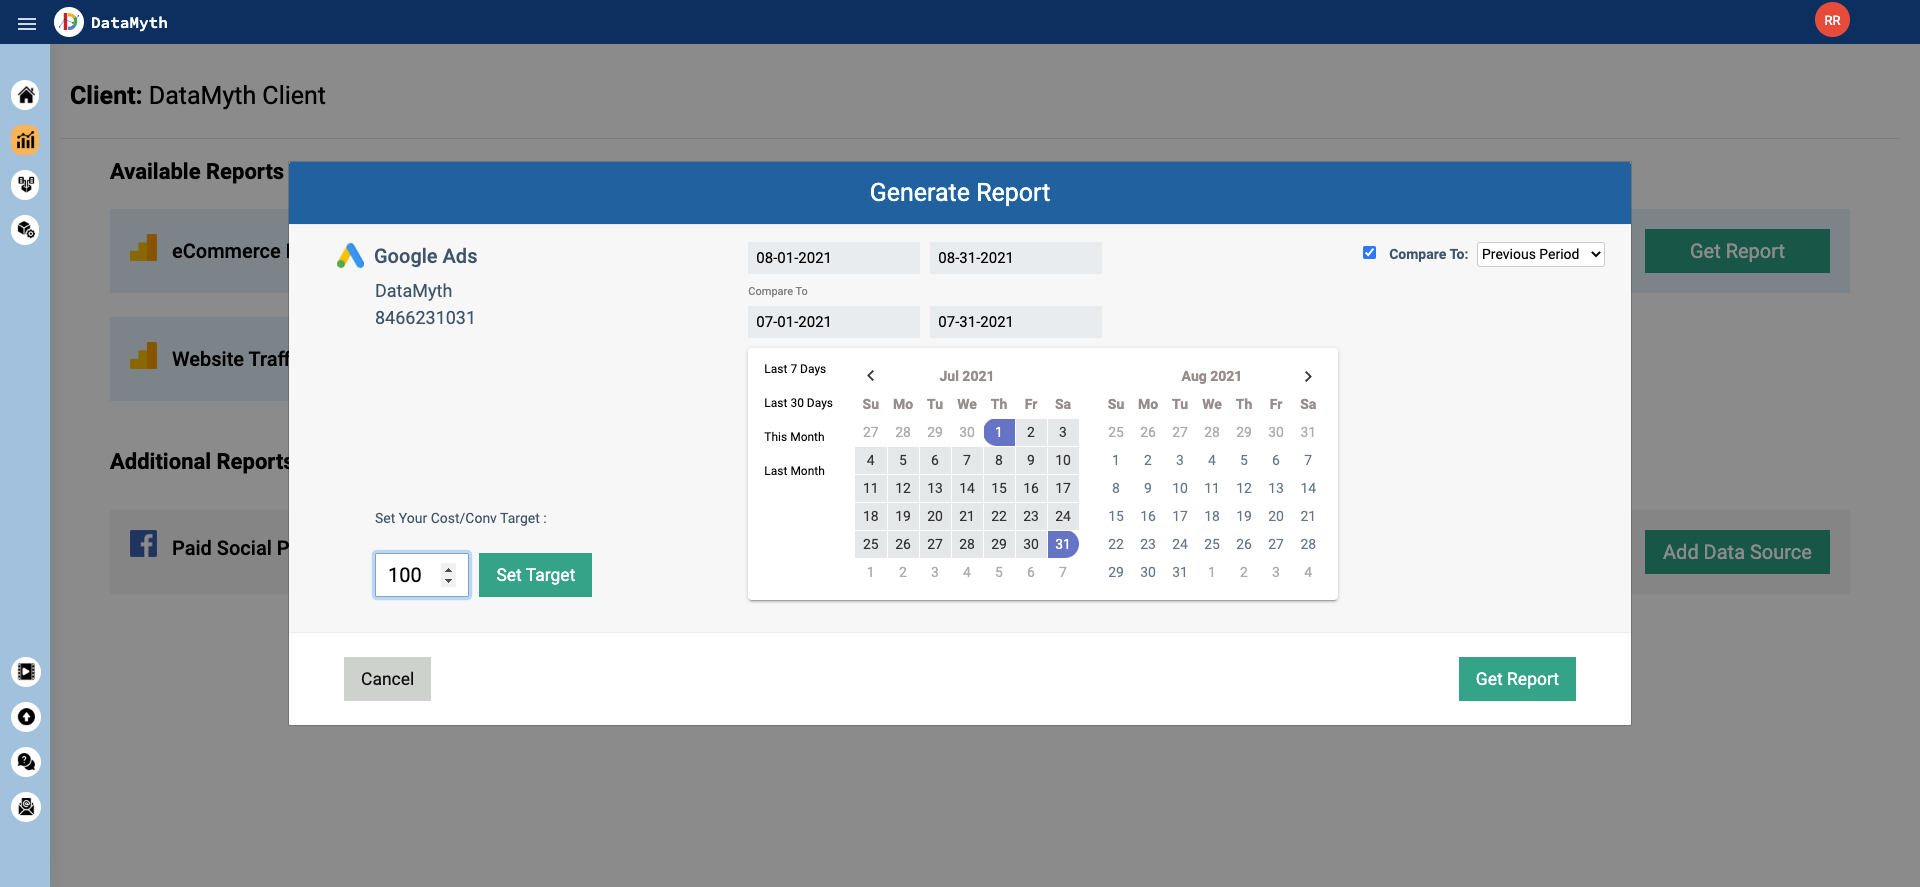
- For Facebook Ads, start by selecting the results associated with your campaign objective.
- Next, to run the report, select the date range, and select the ‘Compare to’ option along with the time frame and hit ‘Get Report’. If you do not want to compare the performance, select the date range, and hit ‘Get Report’.
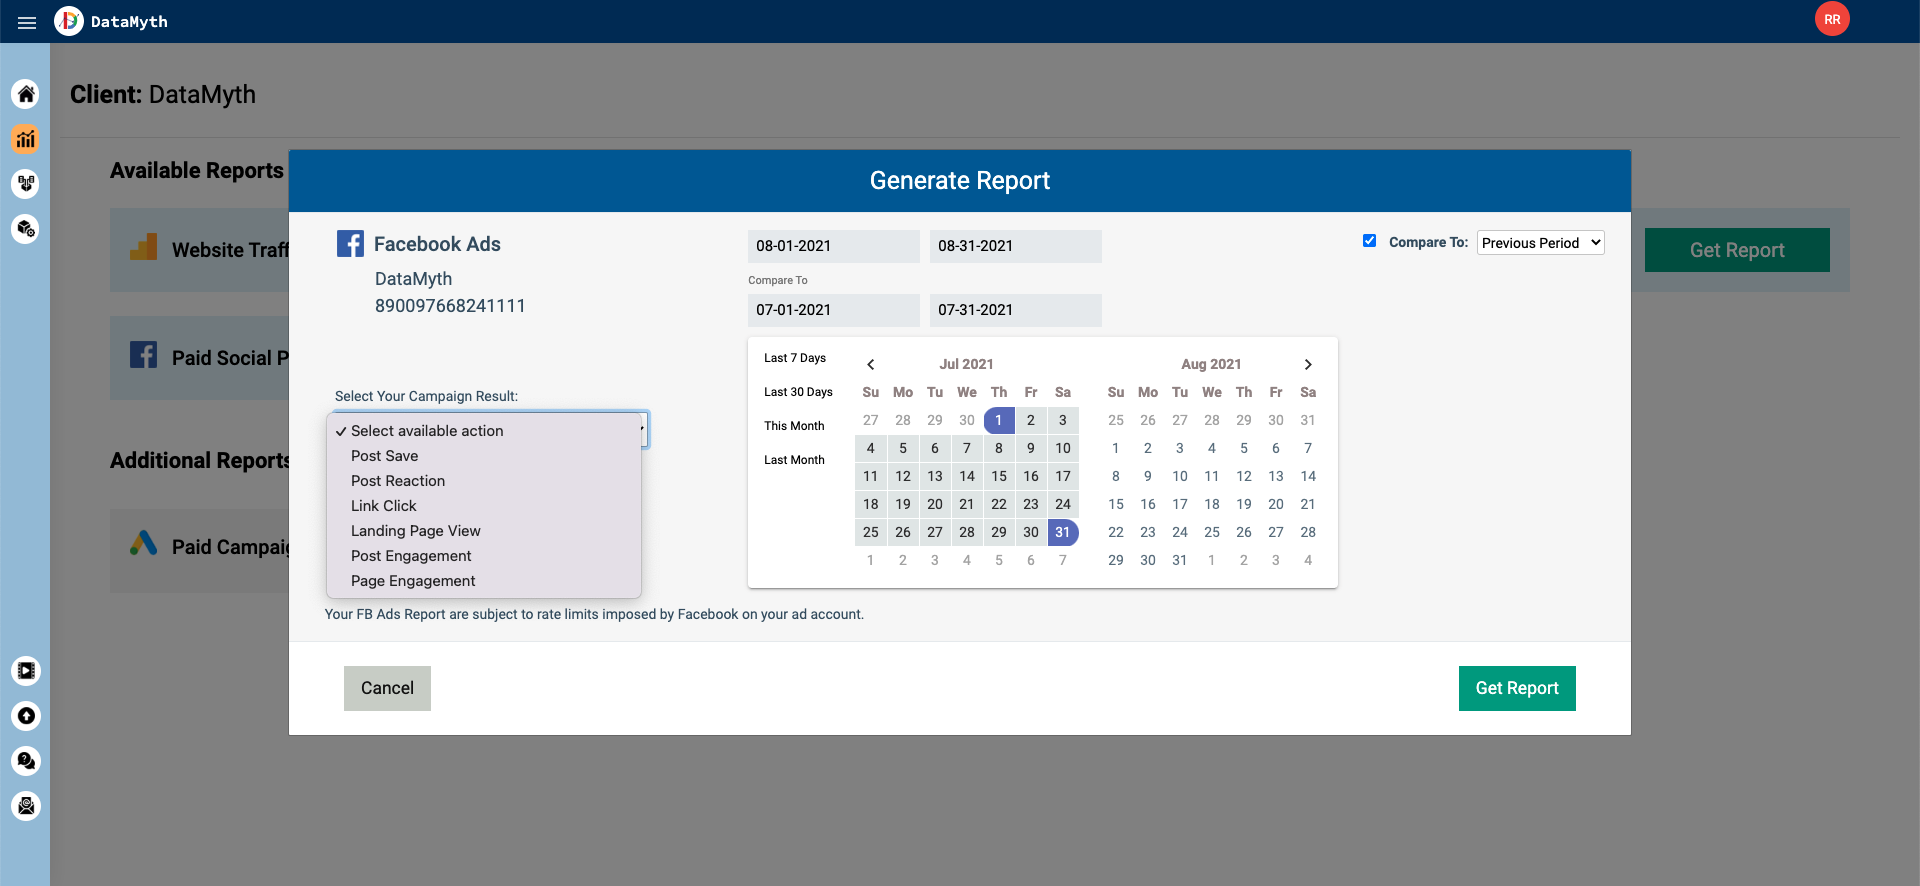
- For Google Search Console, provide one ‘Brand term’.
- Next, to run the report, select the date range, and select the ‘Compare to’ option along with the time frame and hit ‘Get Report’. If you do not want to compare the performance, select the date range, and hit ‘Get Report’.
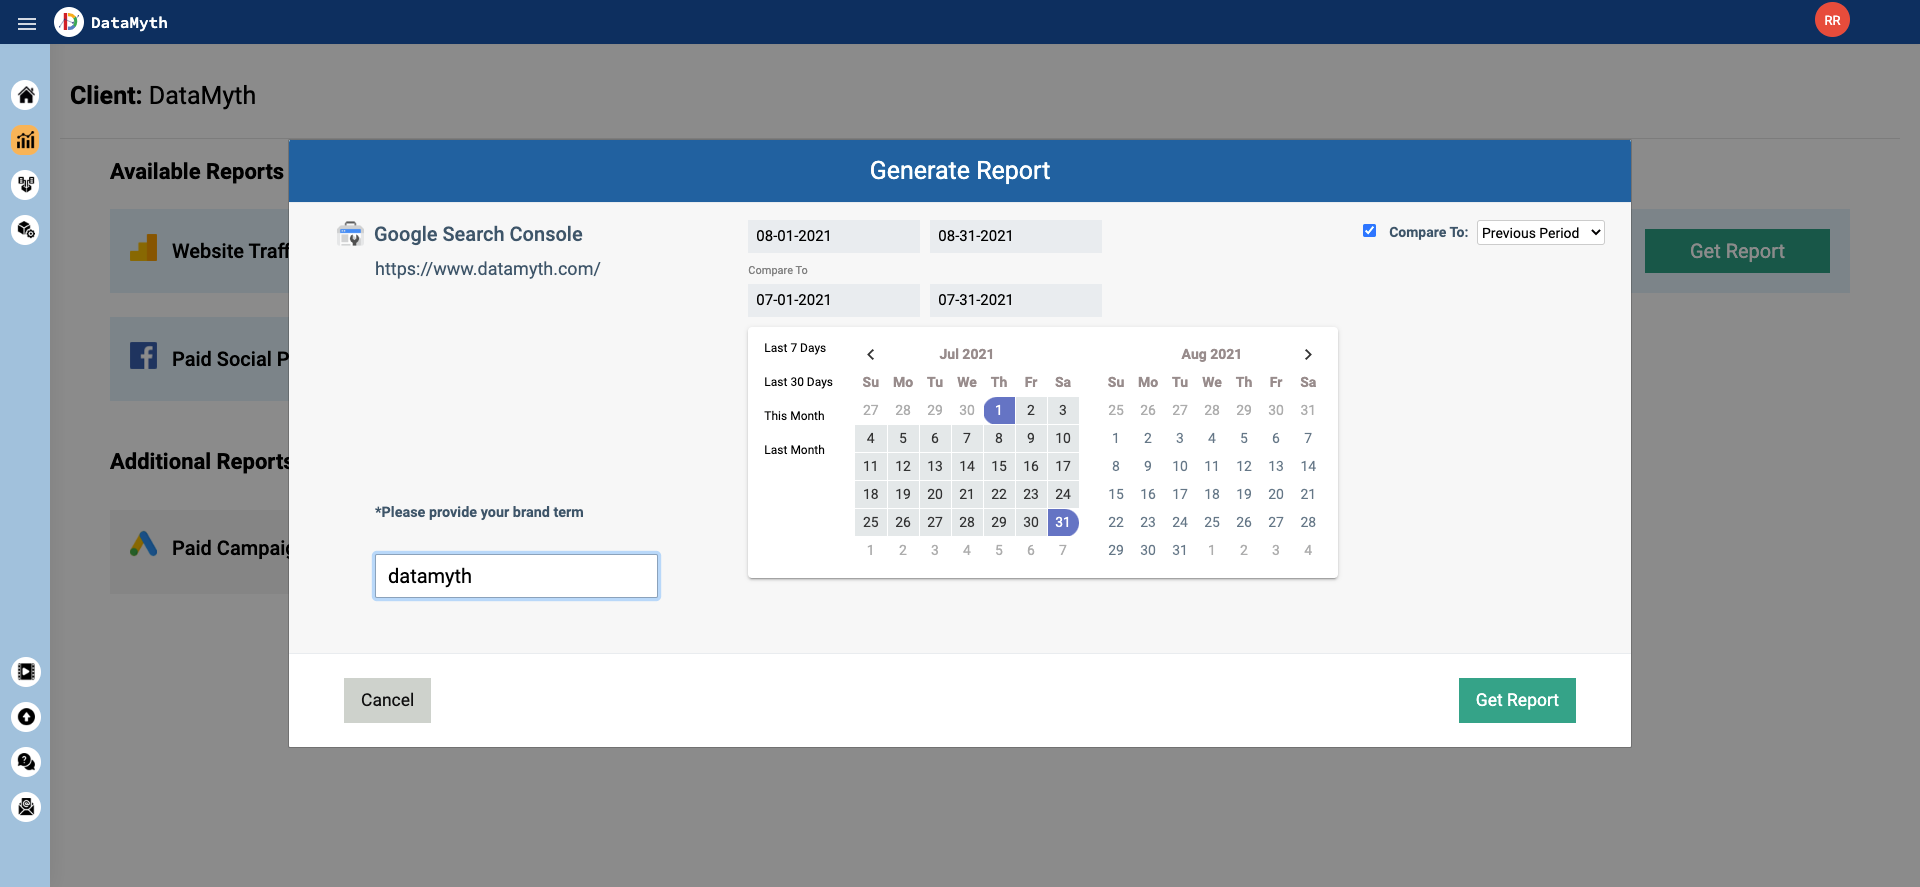
- For Google Analytics, select the date range like you would do on your Google Analytics account and select the ‘Compare to’ option along with the time frame and hit ‘Get Report’.
My Account Page
How to use ‘My Account’ page?
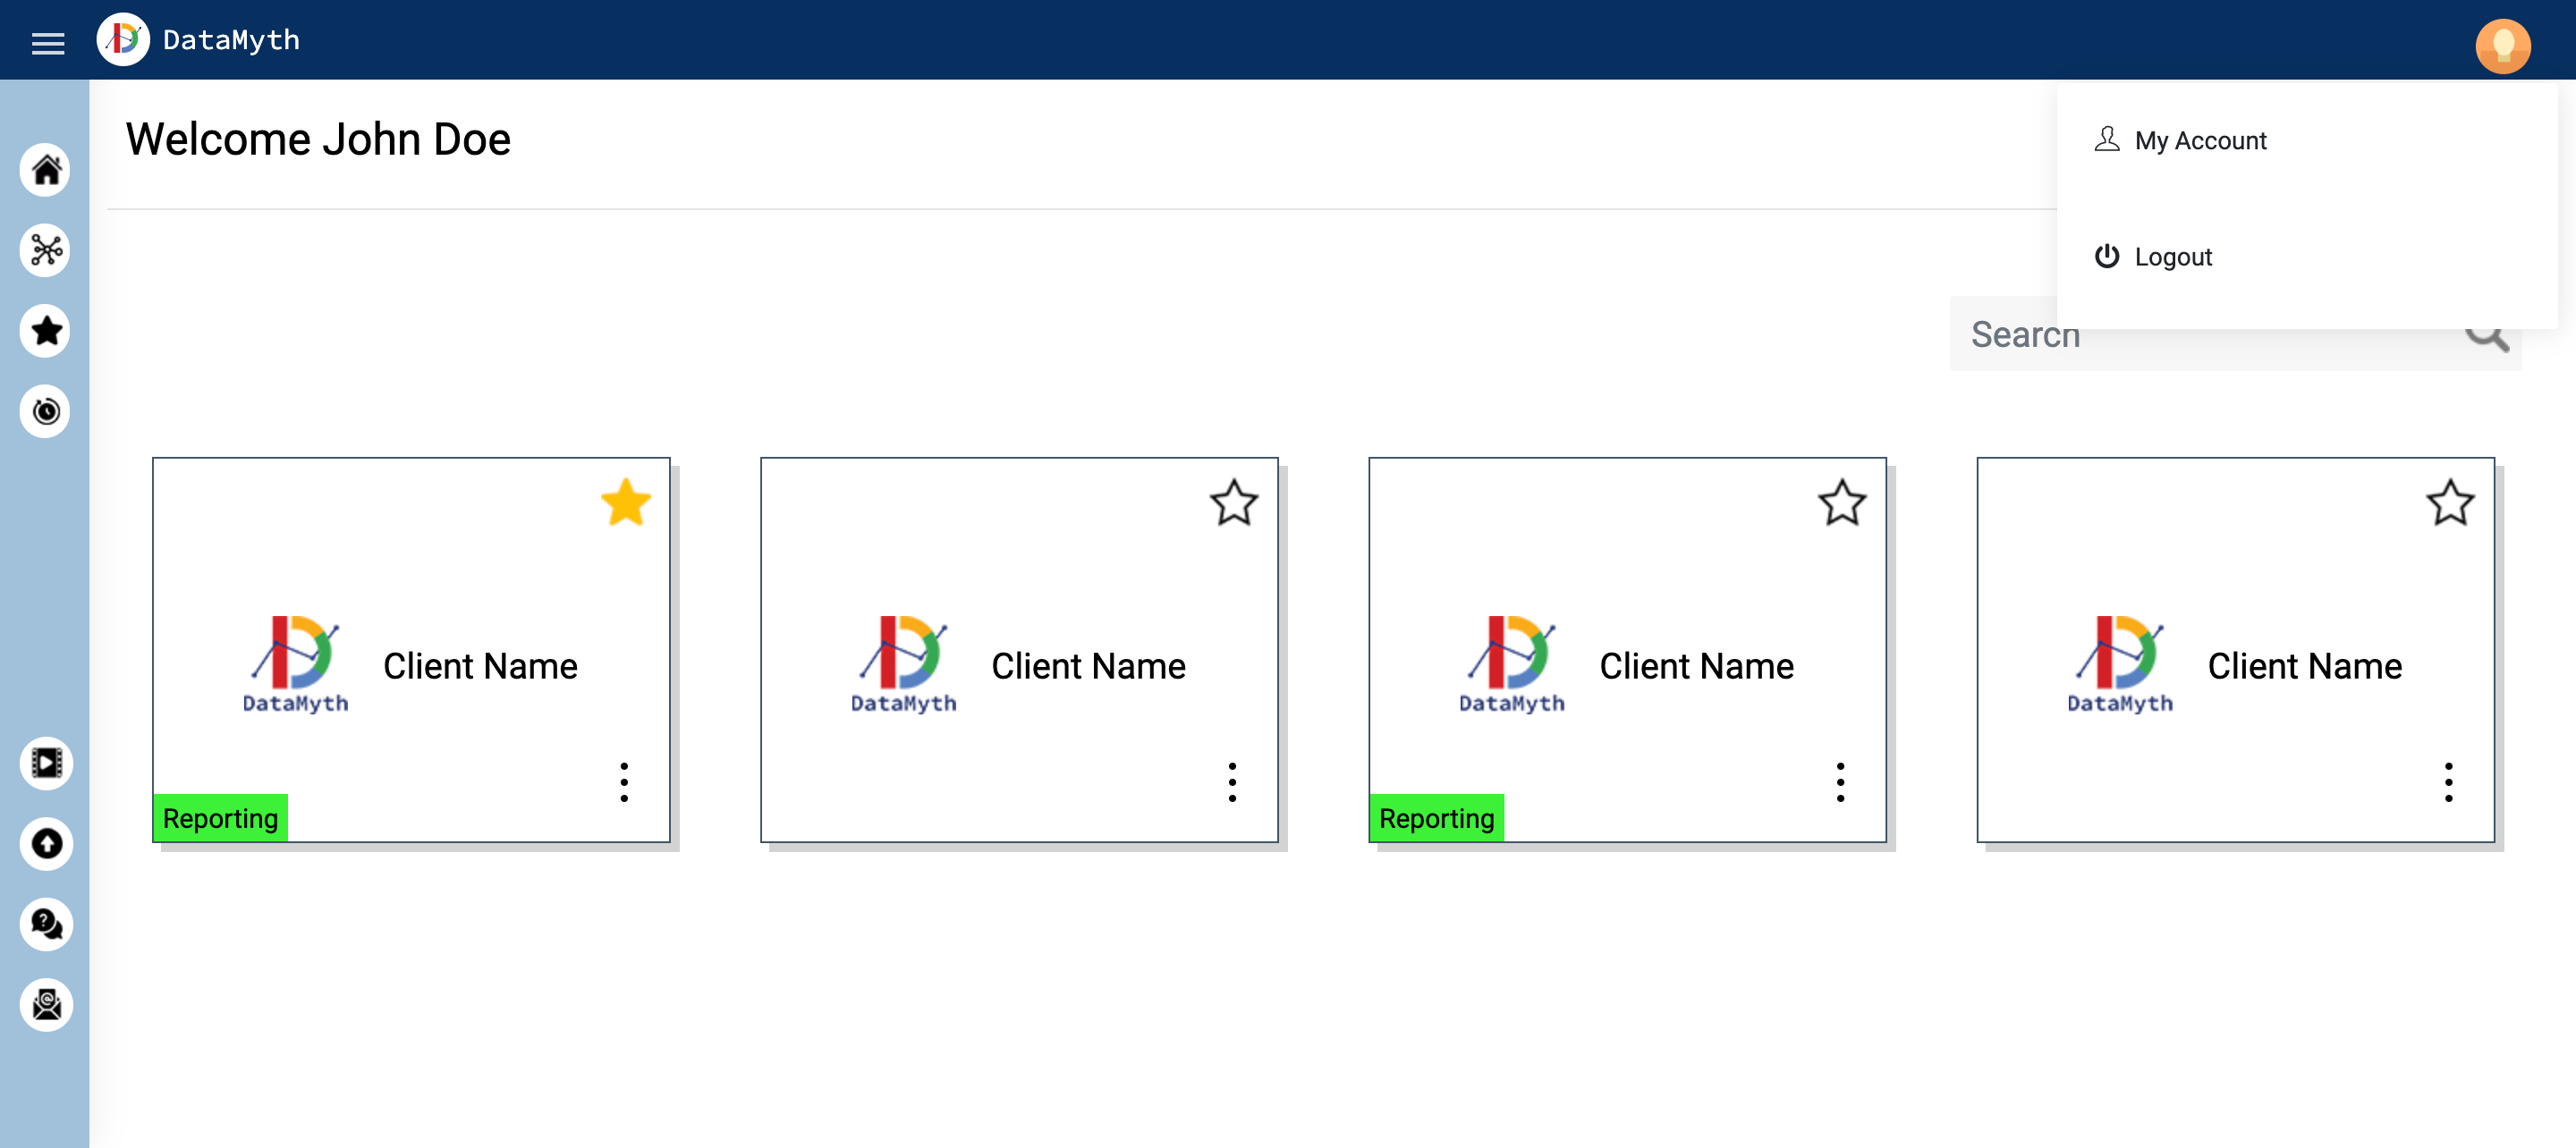
- Click on your name initials on the top right corner.
- Click ‘My Account’ on the popup.
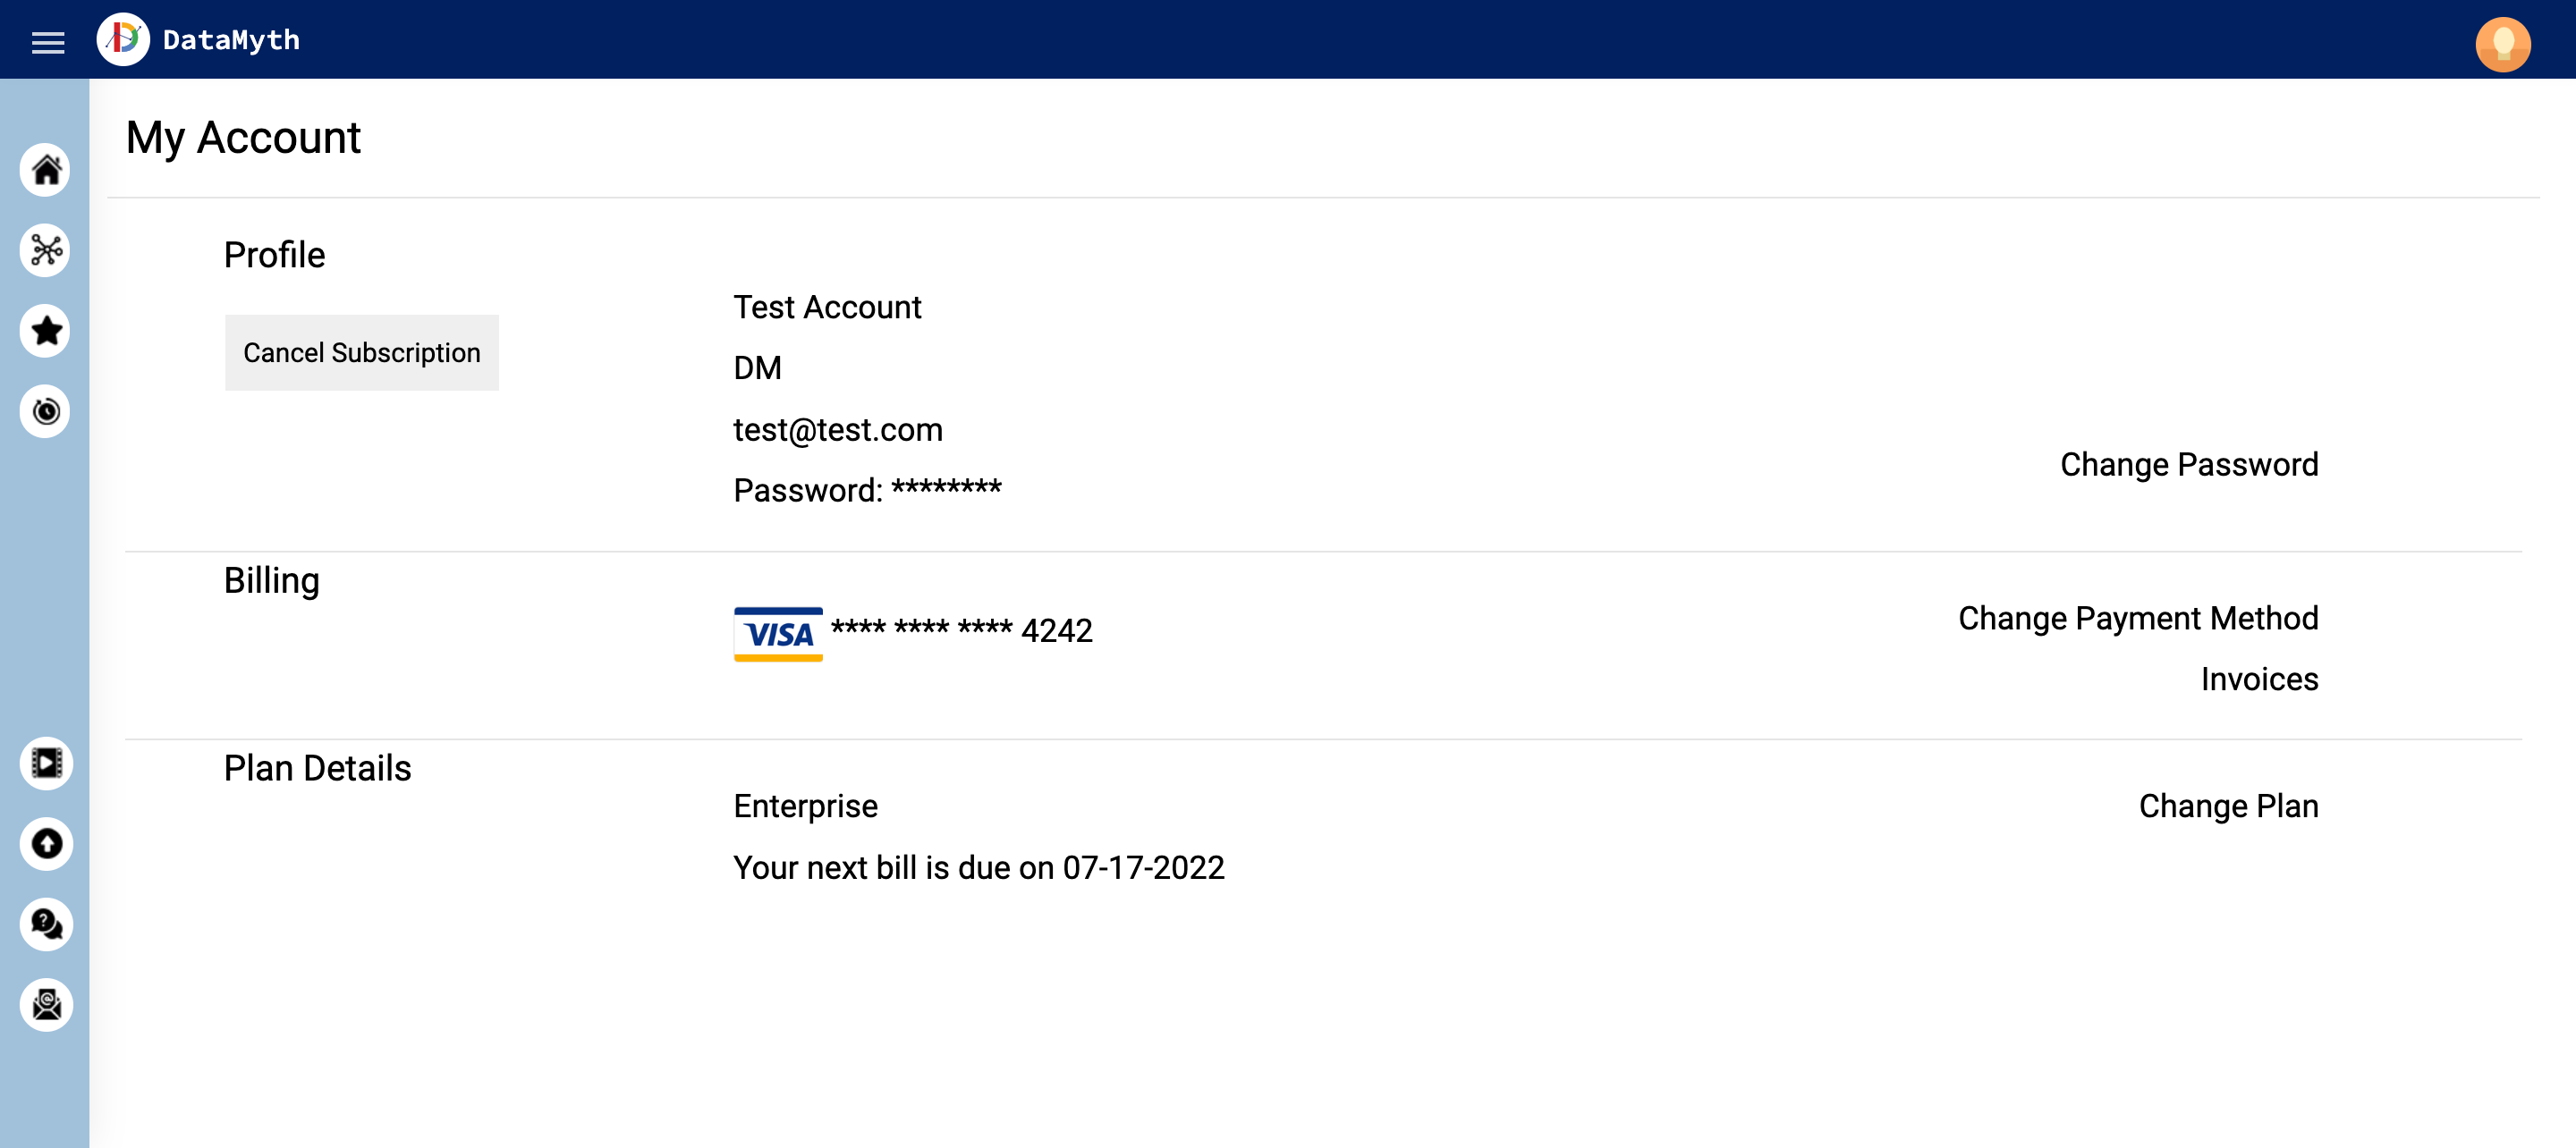
- The ‘My Account’ page will give you the option to:
- Change your password
- Update billing details
- Access invoices
- Change existing plans
Change Password
How to ‘Change your Password’?
- To change your password, go to the ‘My Account’ page by clicking on your name initials on the top right corner, and click ‘My Account’ on the popup.
- Click ‘Change Password’ in the ‘Profile’ section.

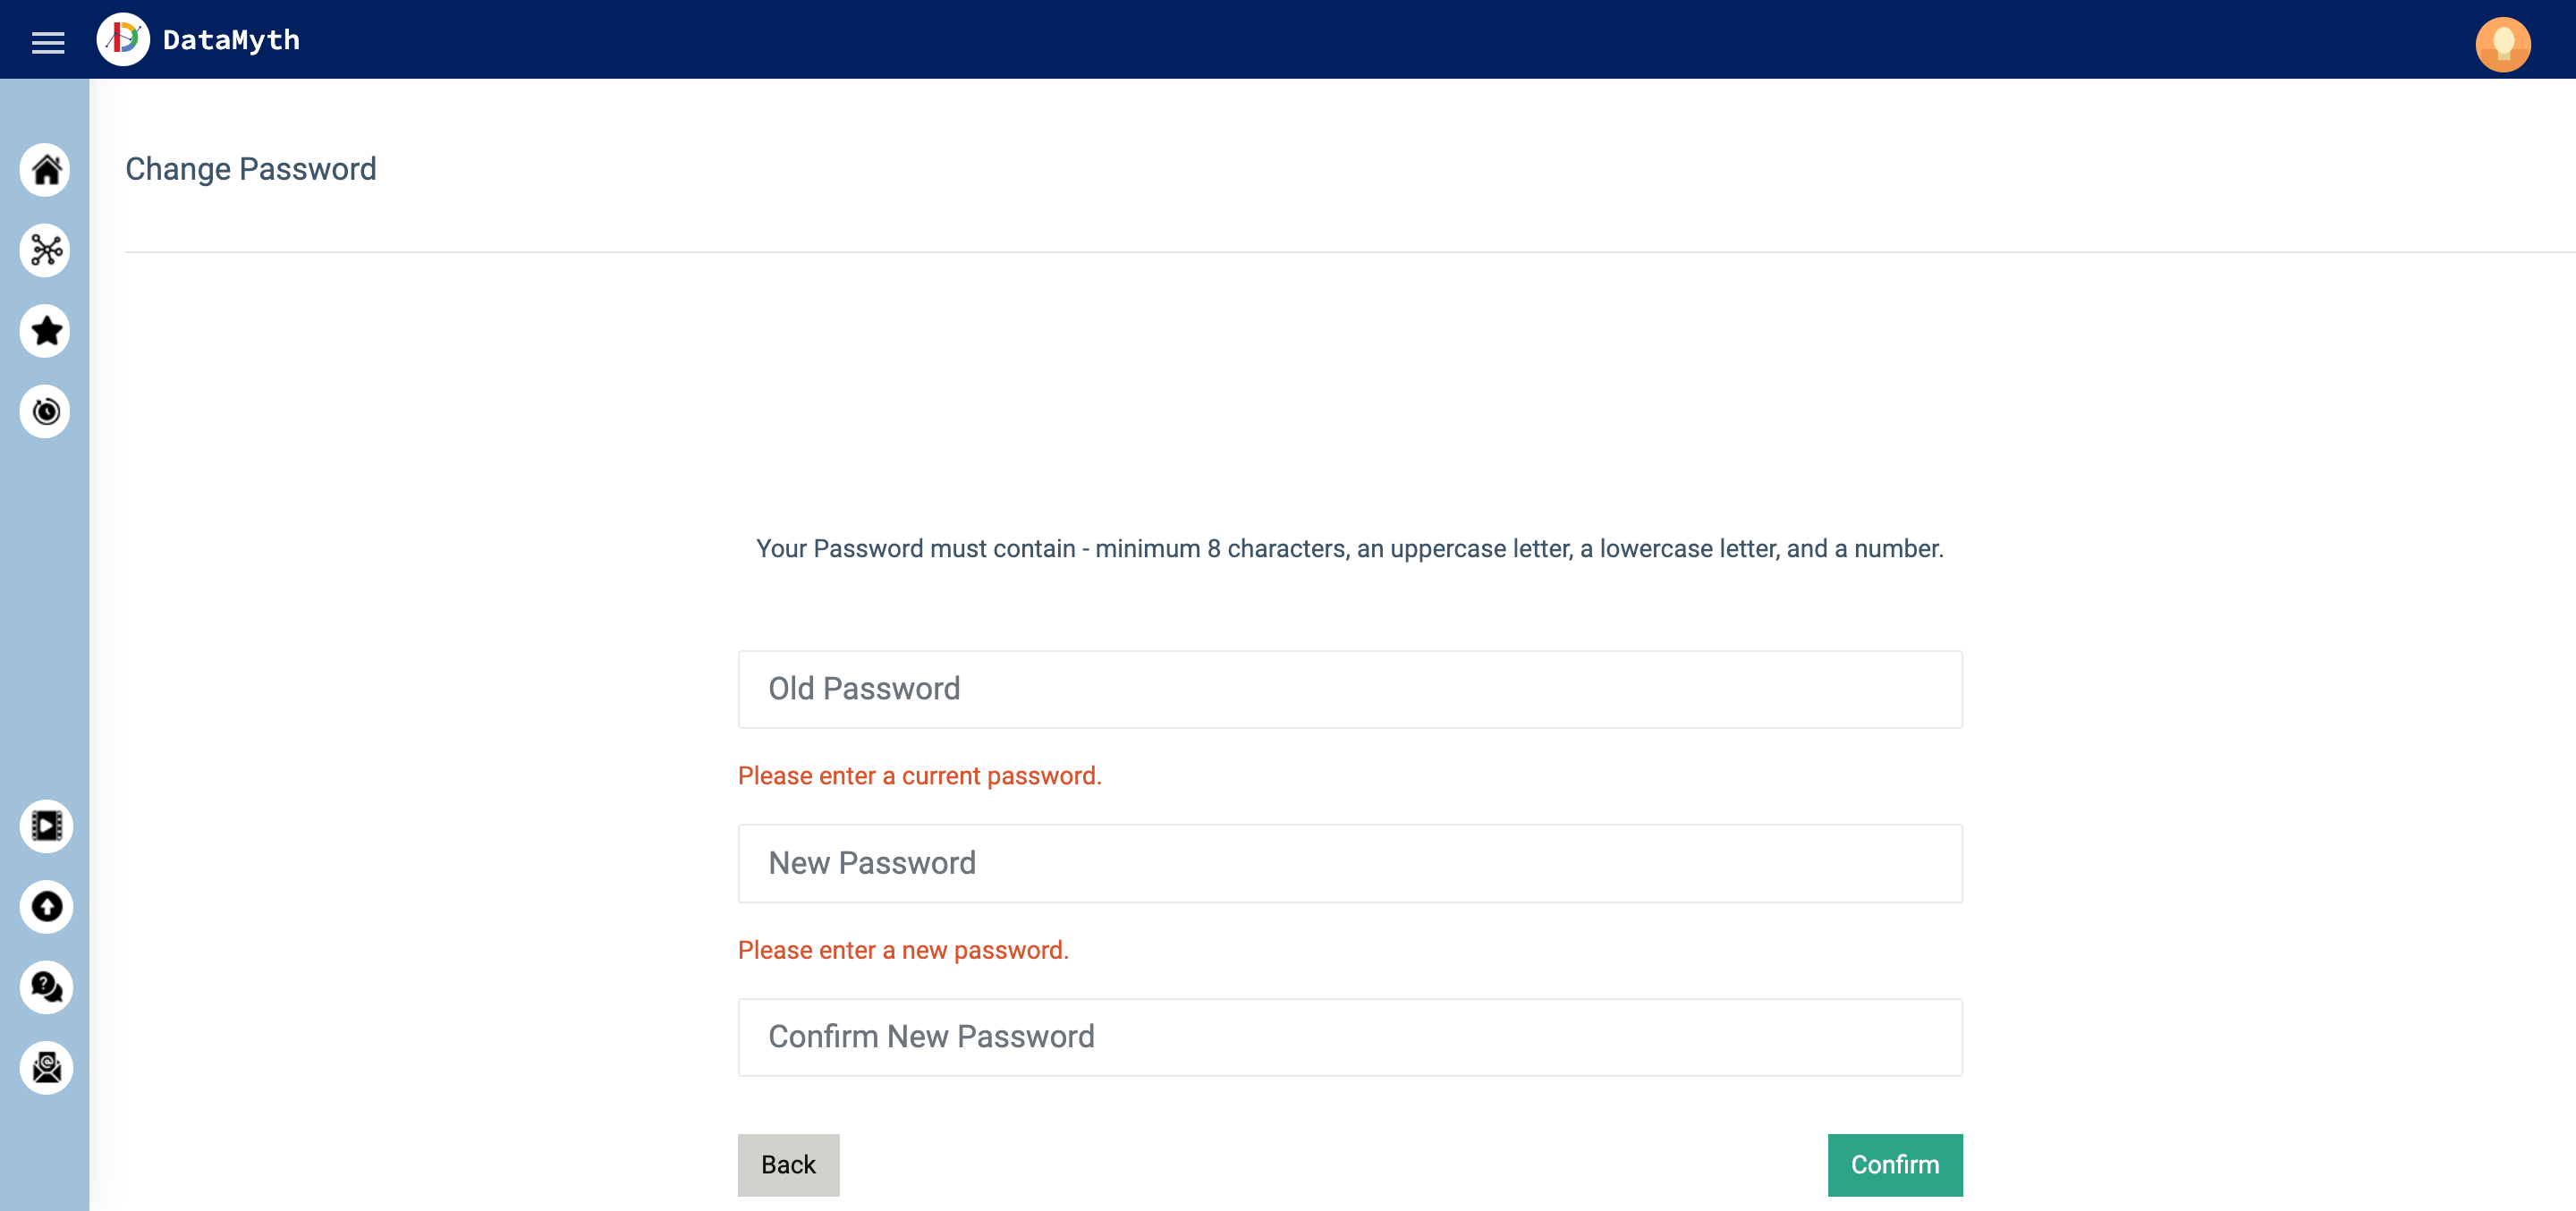
- Insert your old password followed by the new password twice.
- Your password should have a minimum of 8 characters, an uppercase letter, a lowercase letter, and a number.
- Once done, hit the ‘Confirm’ button.
- You will see the confirmation message on the top right off the screen.
Update Payment Method
How to ‘Update your Payment Method’?
- To change your payment method, go to the ‘My Account’ page by clicking on your name initials on the top right corner, and click ‘My Account’ on the popup.
- Click ‘Change Payment Method’ in the ‘Billing’ section.

- Add your card details, and hit the ‘Confirm’ button.
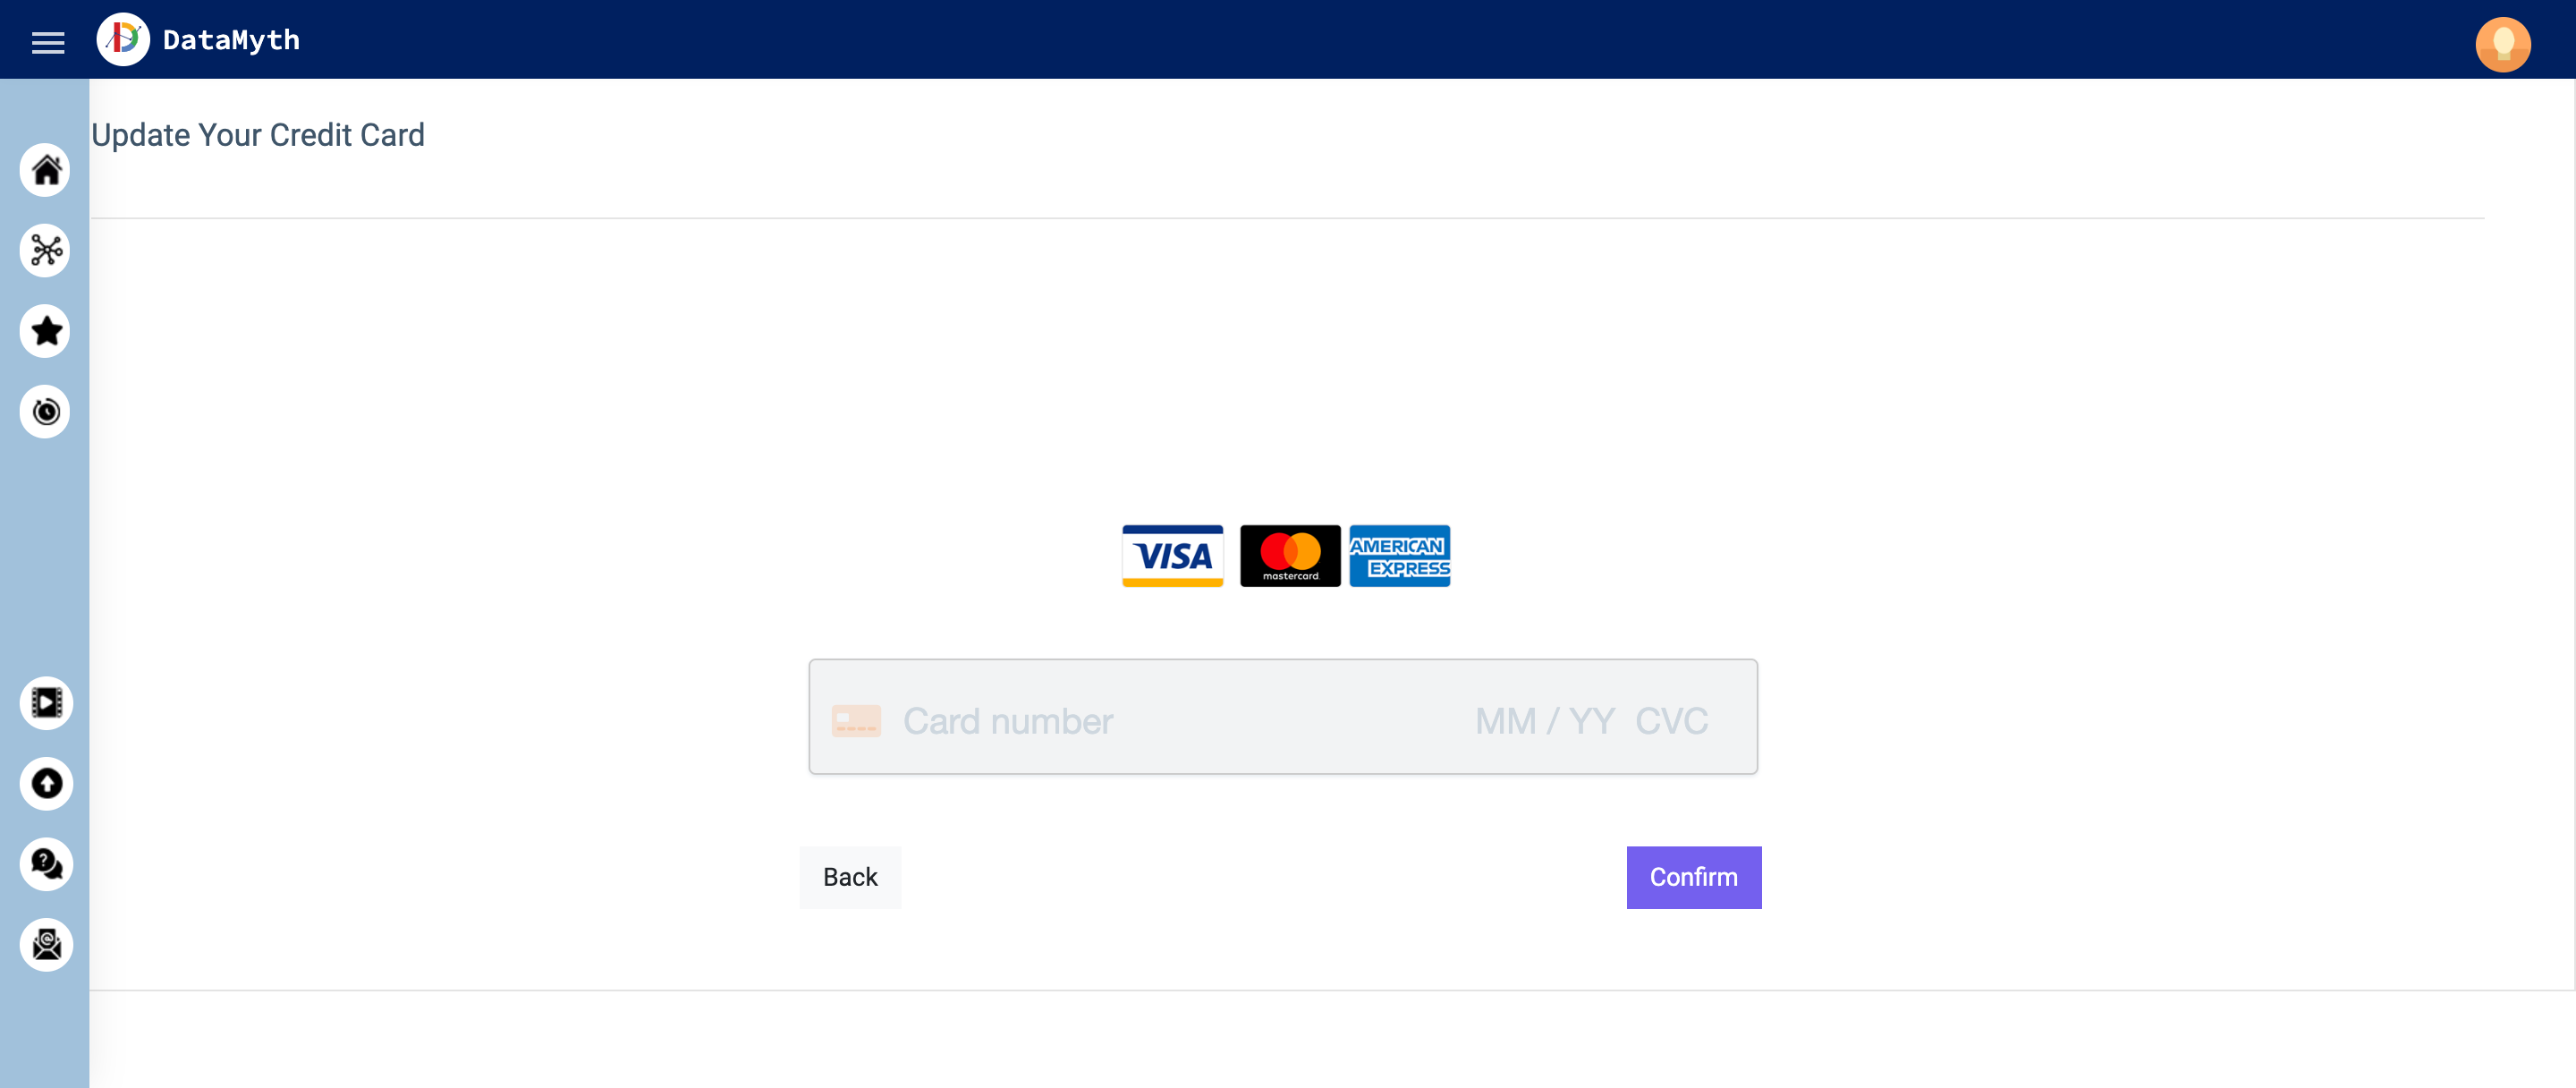
- You will see the confirmation message on the top right off the screen.
Invoice
Check your ‘Invoice’ details
- To view any or all your invoices, go to the ‘My Account’ page by clicking on your name initials on the top right corner, and click ‘My Account’ on the popup.
- Click ‘Invoices’ in the ‘Billing’ section.
- You will have the option to Download invoices by clicking the ‘Download’ option next to the relevant invoice.

Subscribe to a New Plan
How to ‘Subscribe to a Plan’?
- To view the available plans, go to the ‘My Account’ page by clicking on your name initials on the top right corner, and click ‘My Account’ on the popup.
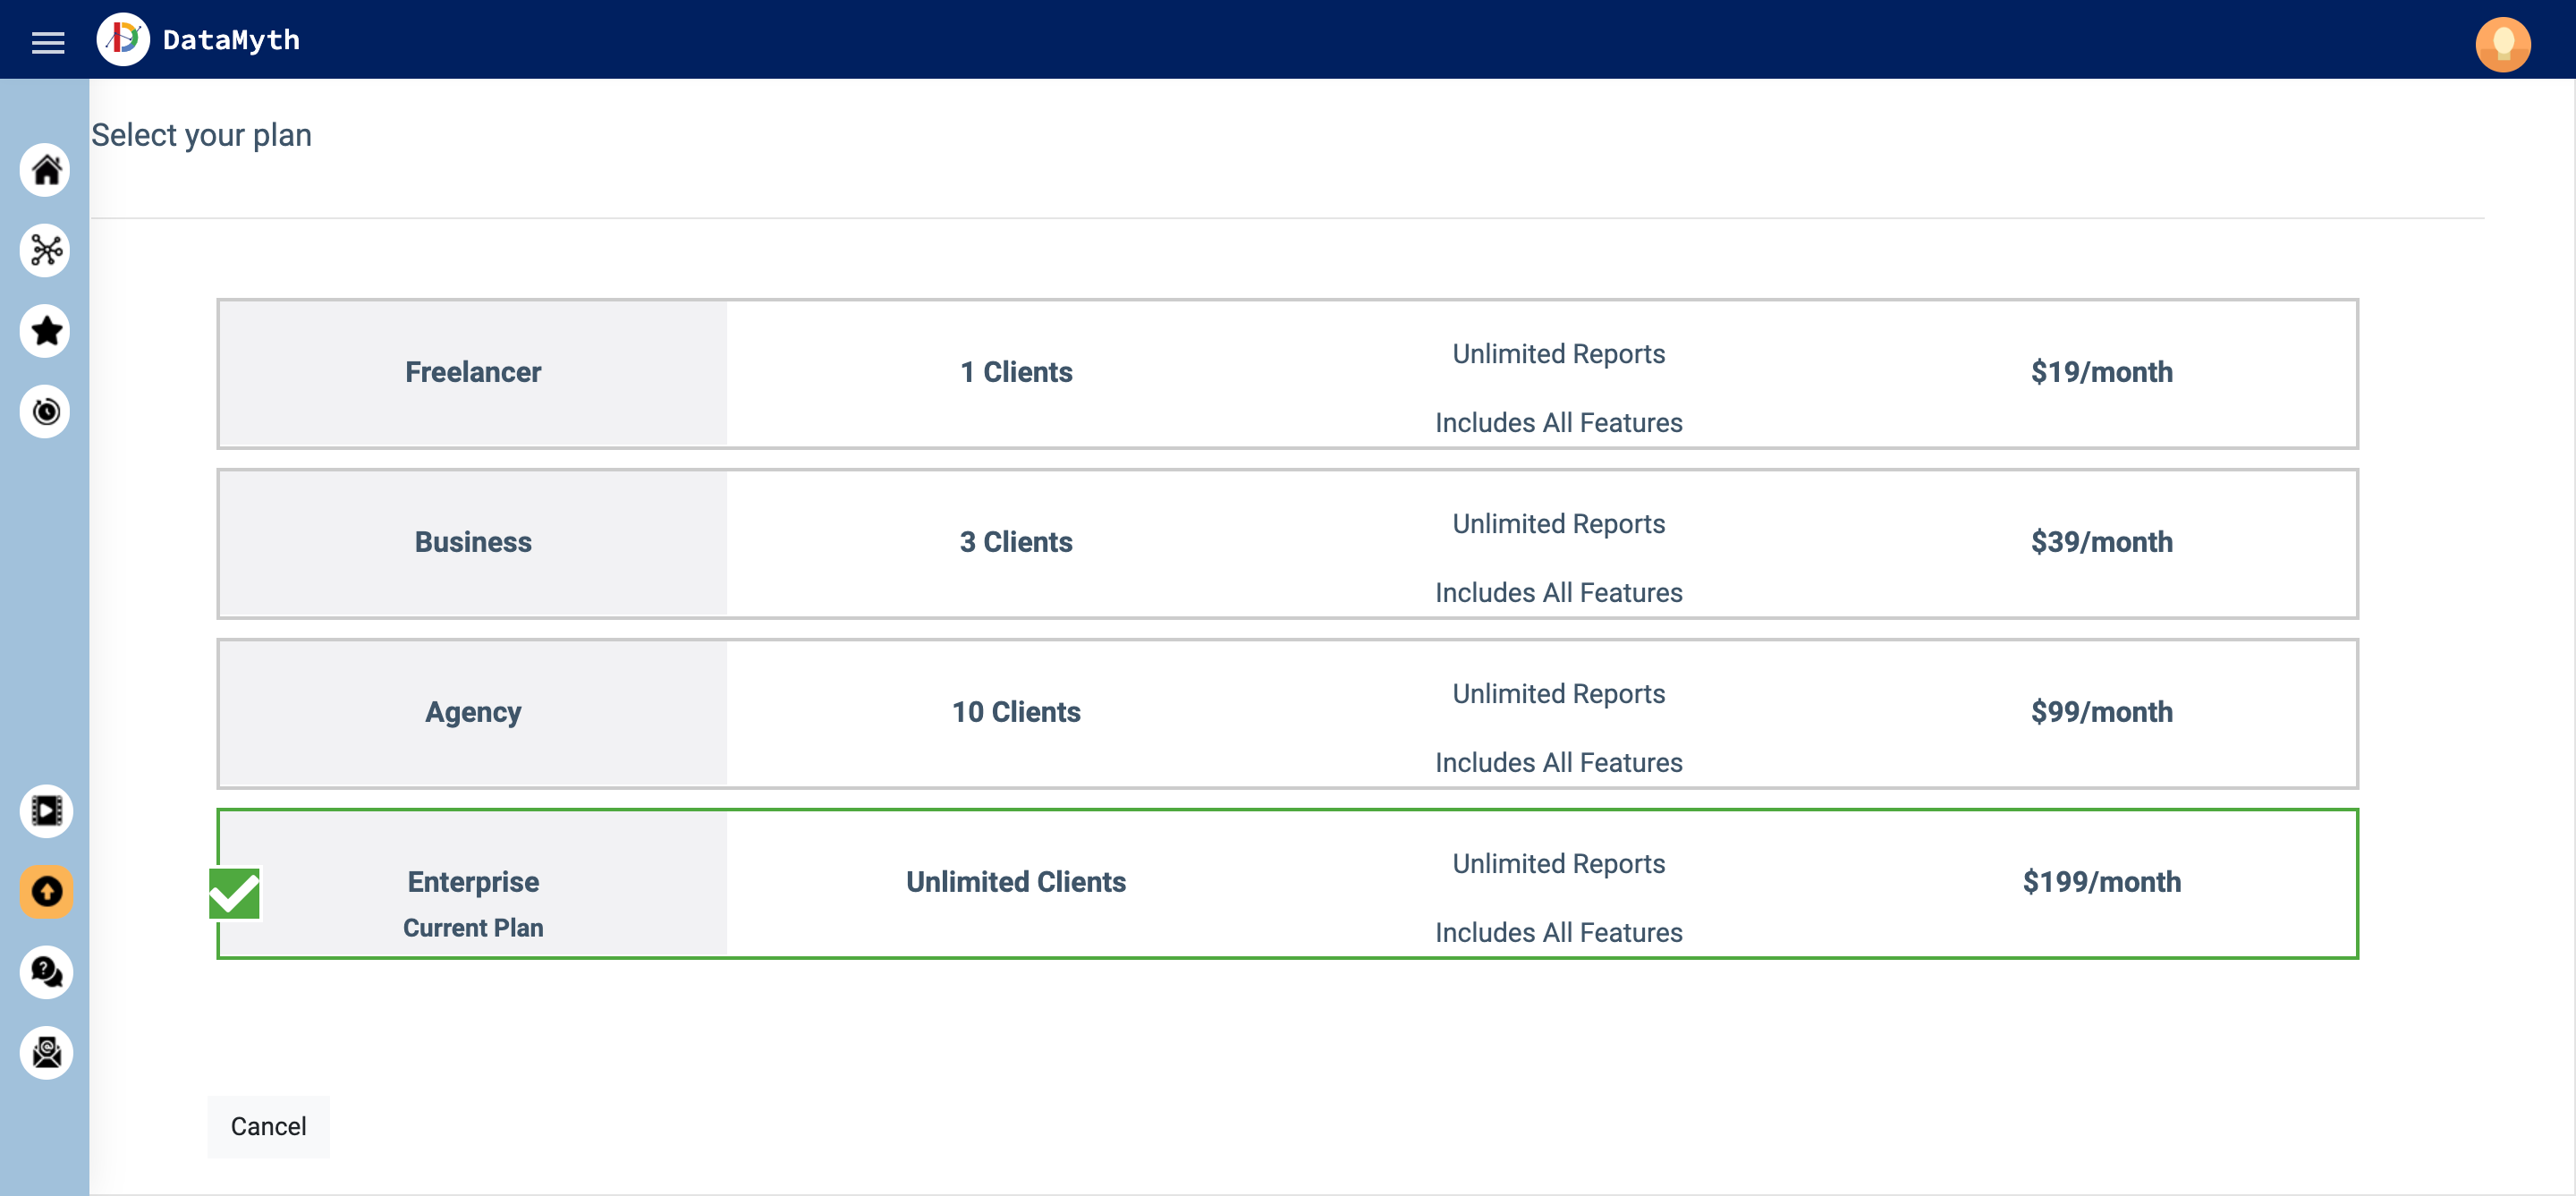
- Click ‘Change Plan’ in the ‘Plan Details’ section to view the plans.

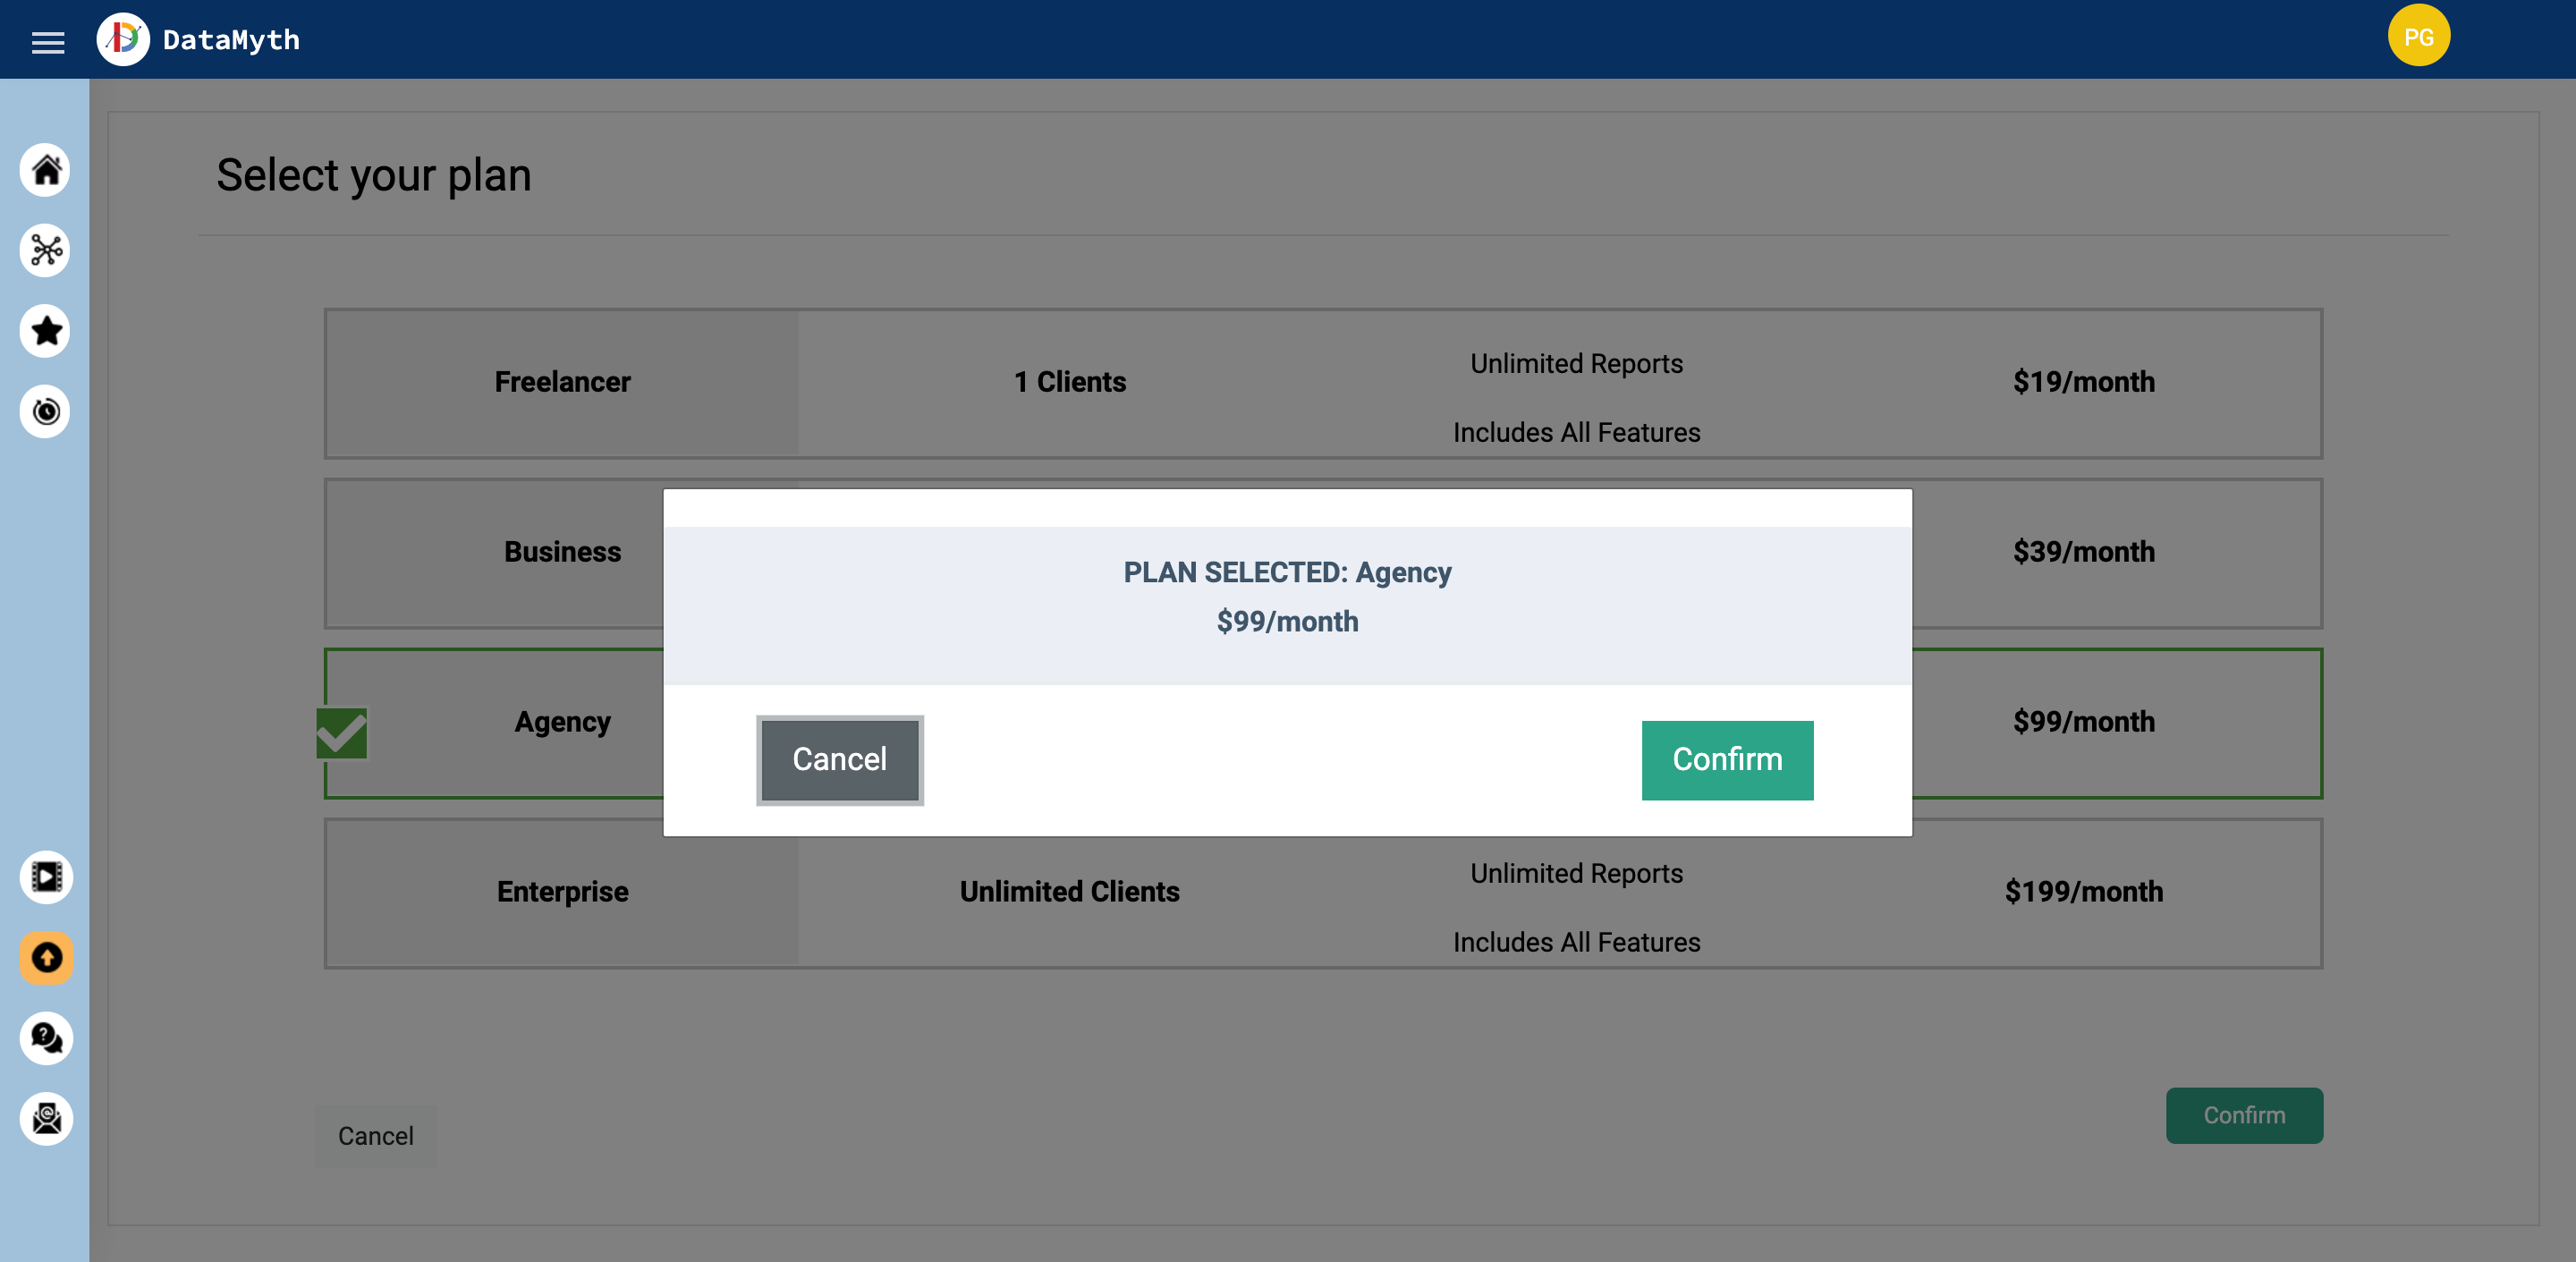
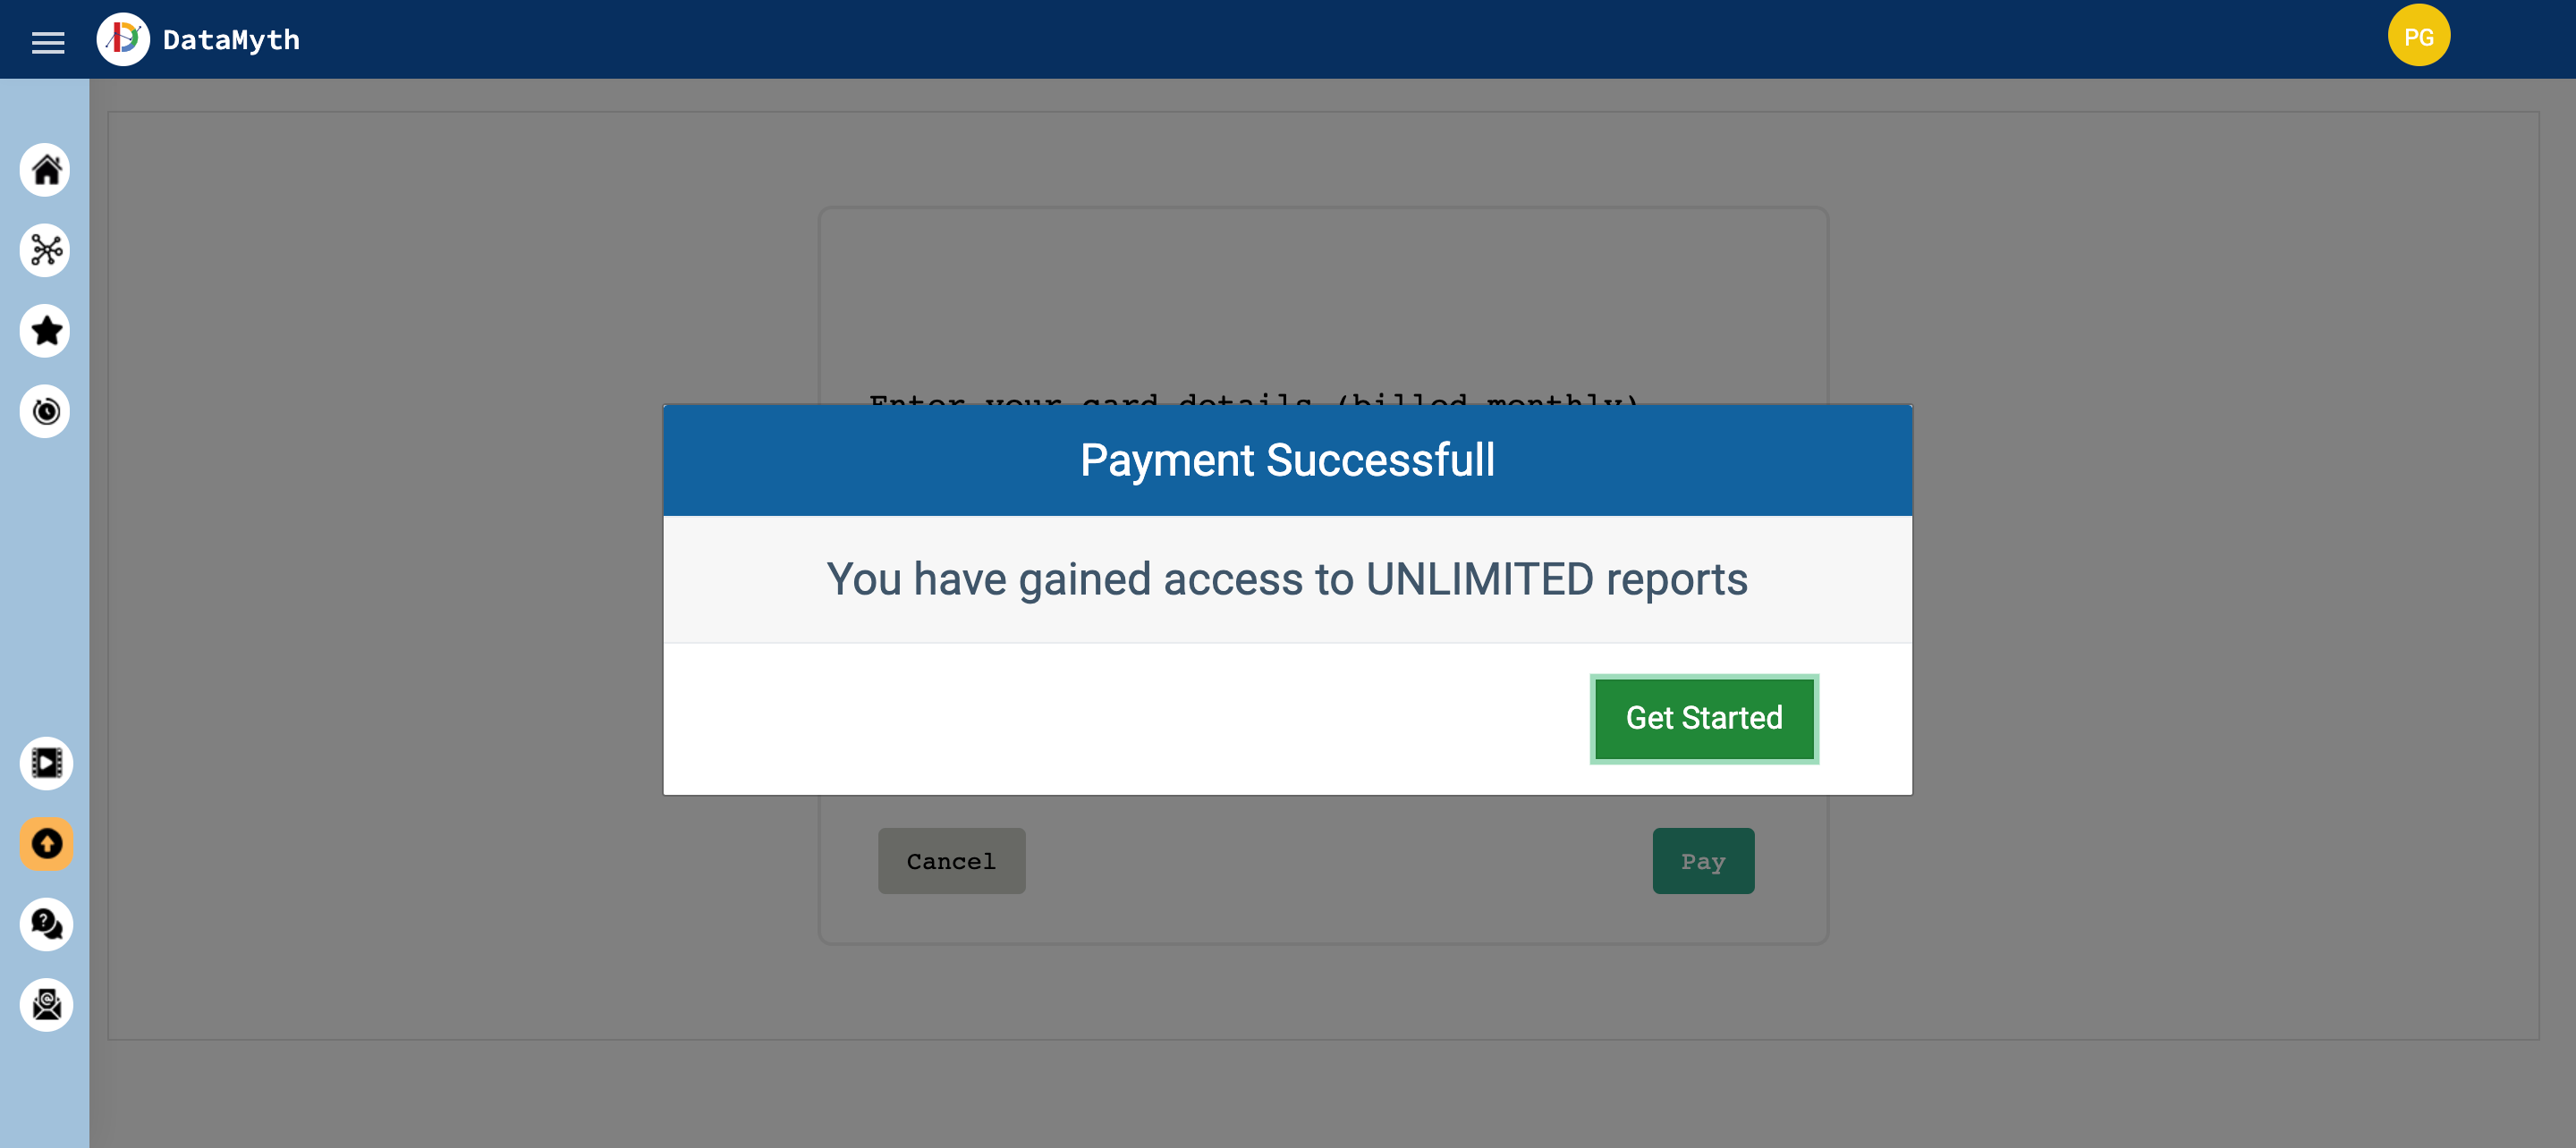
- As a Free Trial user, you will see all the plans available in this section. To add a new plan, select the plan that suits your need and click on it. Once selected, click ‘Confirm’.
- A pop-up will appear with details of the new plan. Hit the ‘Confirm’ button.
- Enter your credit card details on the next screen.
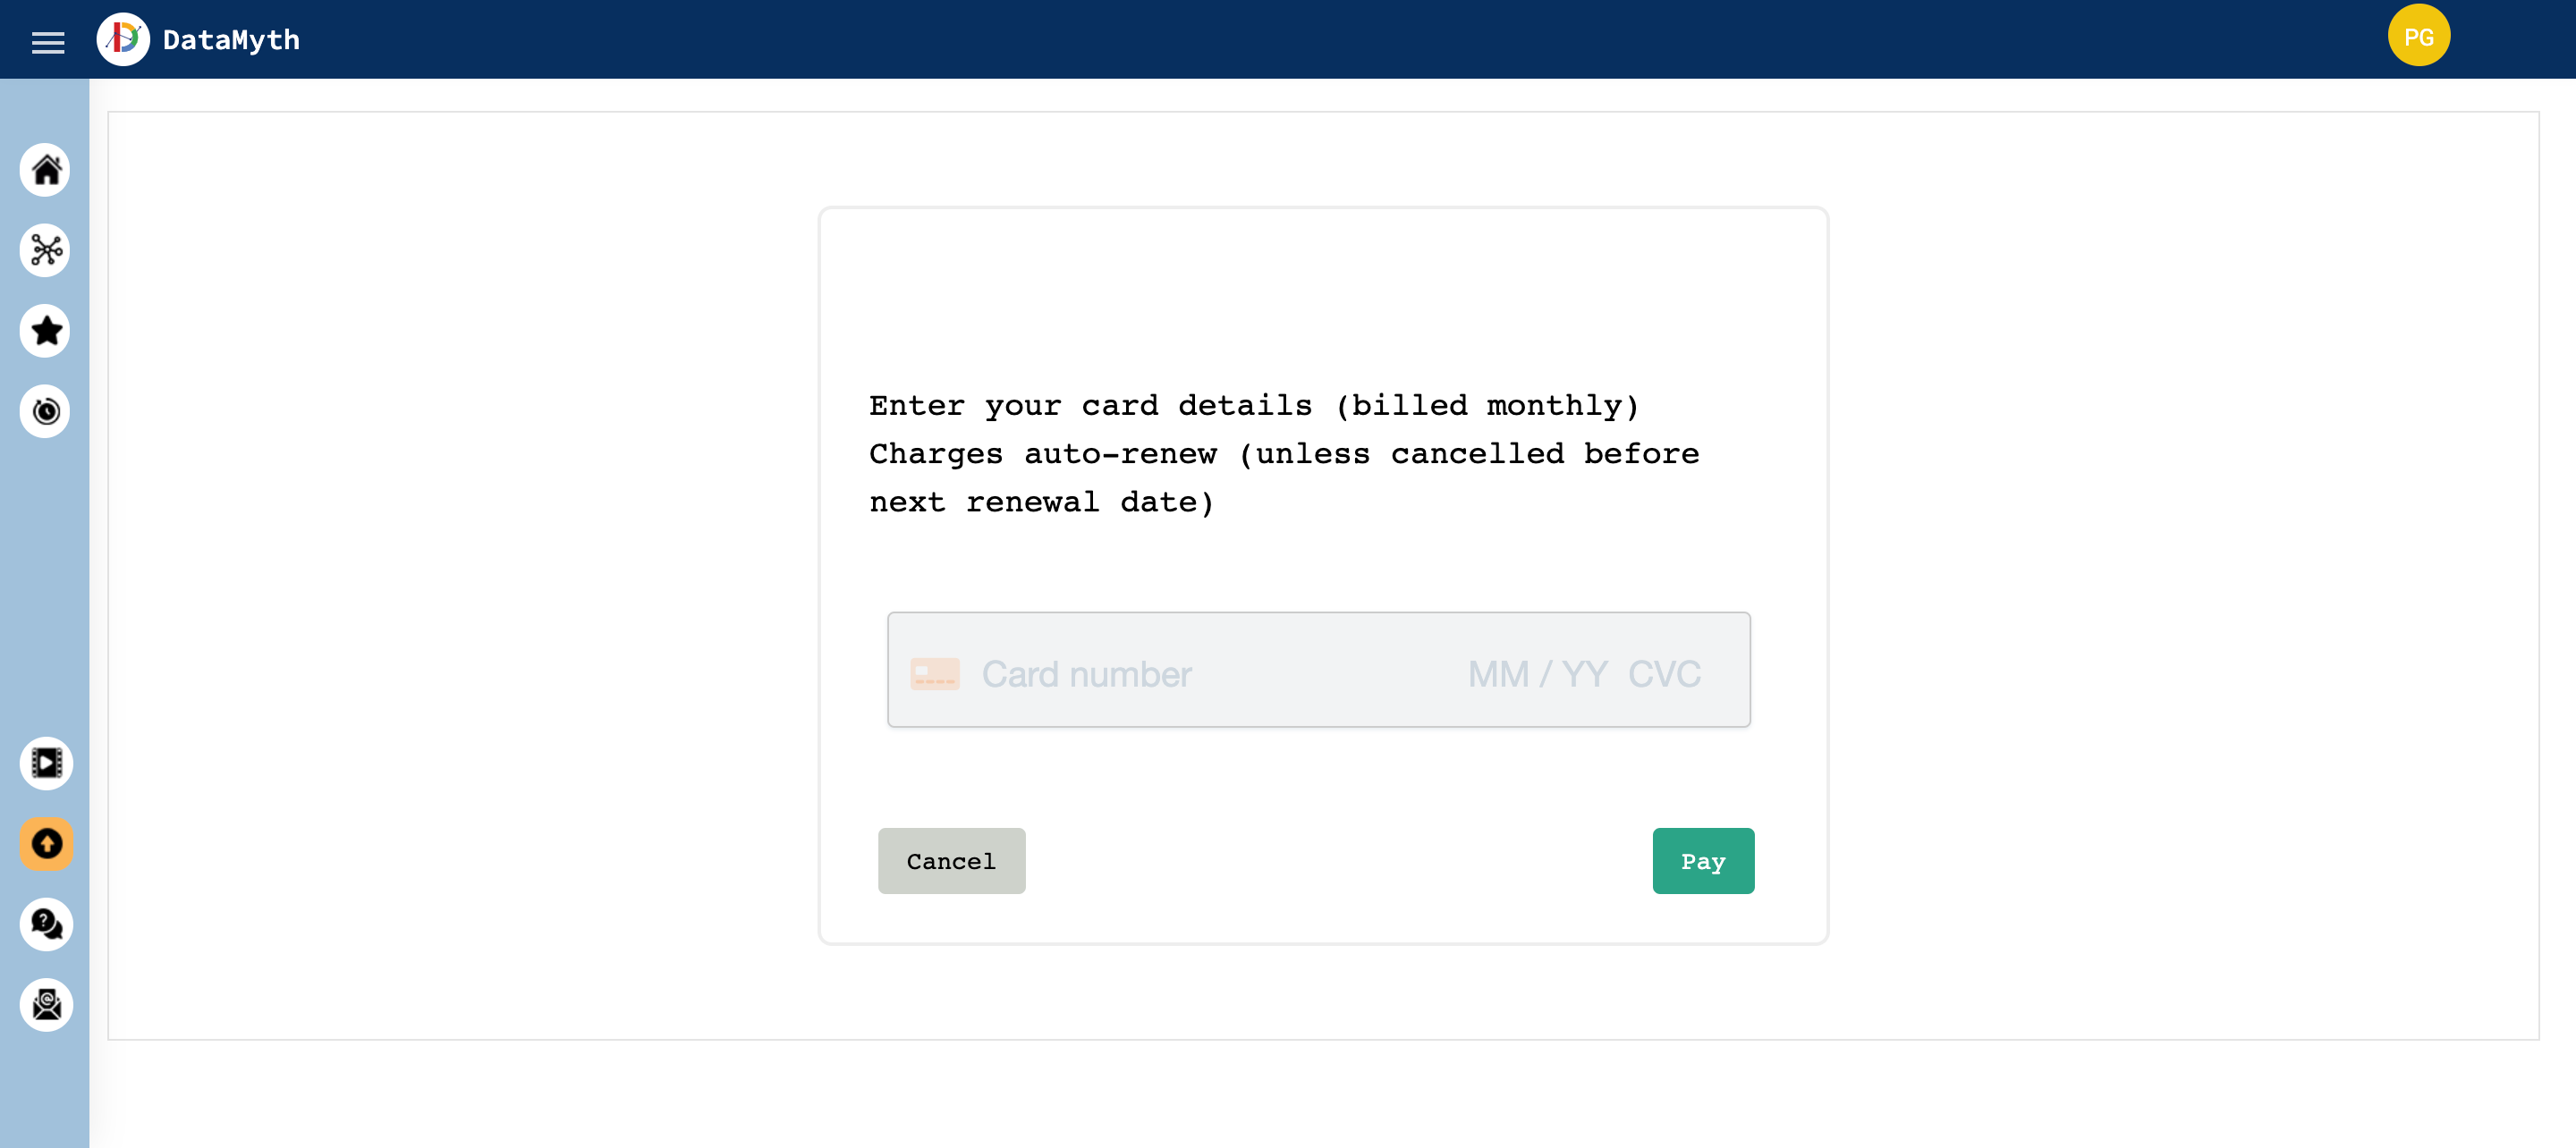 Once done, click ‘Pay’ and you are ready to start building your reports.
Change Existing Paid User Plan
How to ‘Change your Existing Plan’?
- To view the available plans, go to the ‘My Account’ page by clicking on your name initials on the top right corner, and click ‘My Account’ on the popup.
- Click ‘Change Plan’ in the ‘Plan Details’ section to view the plans.

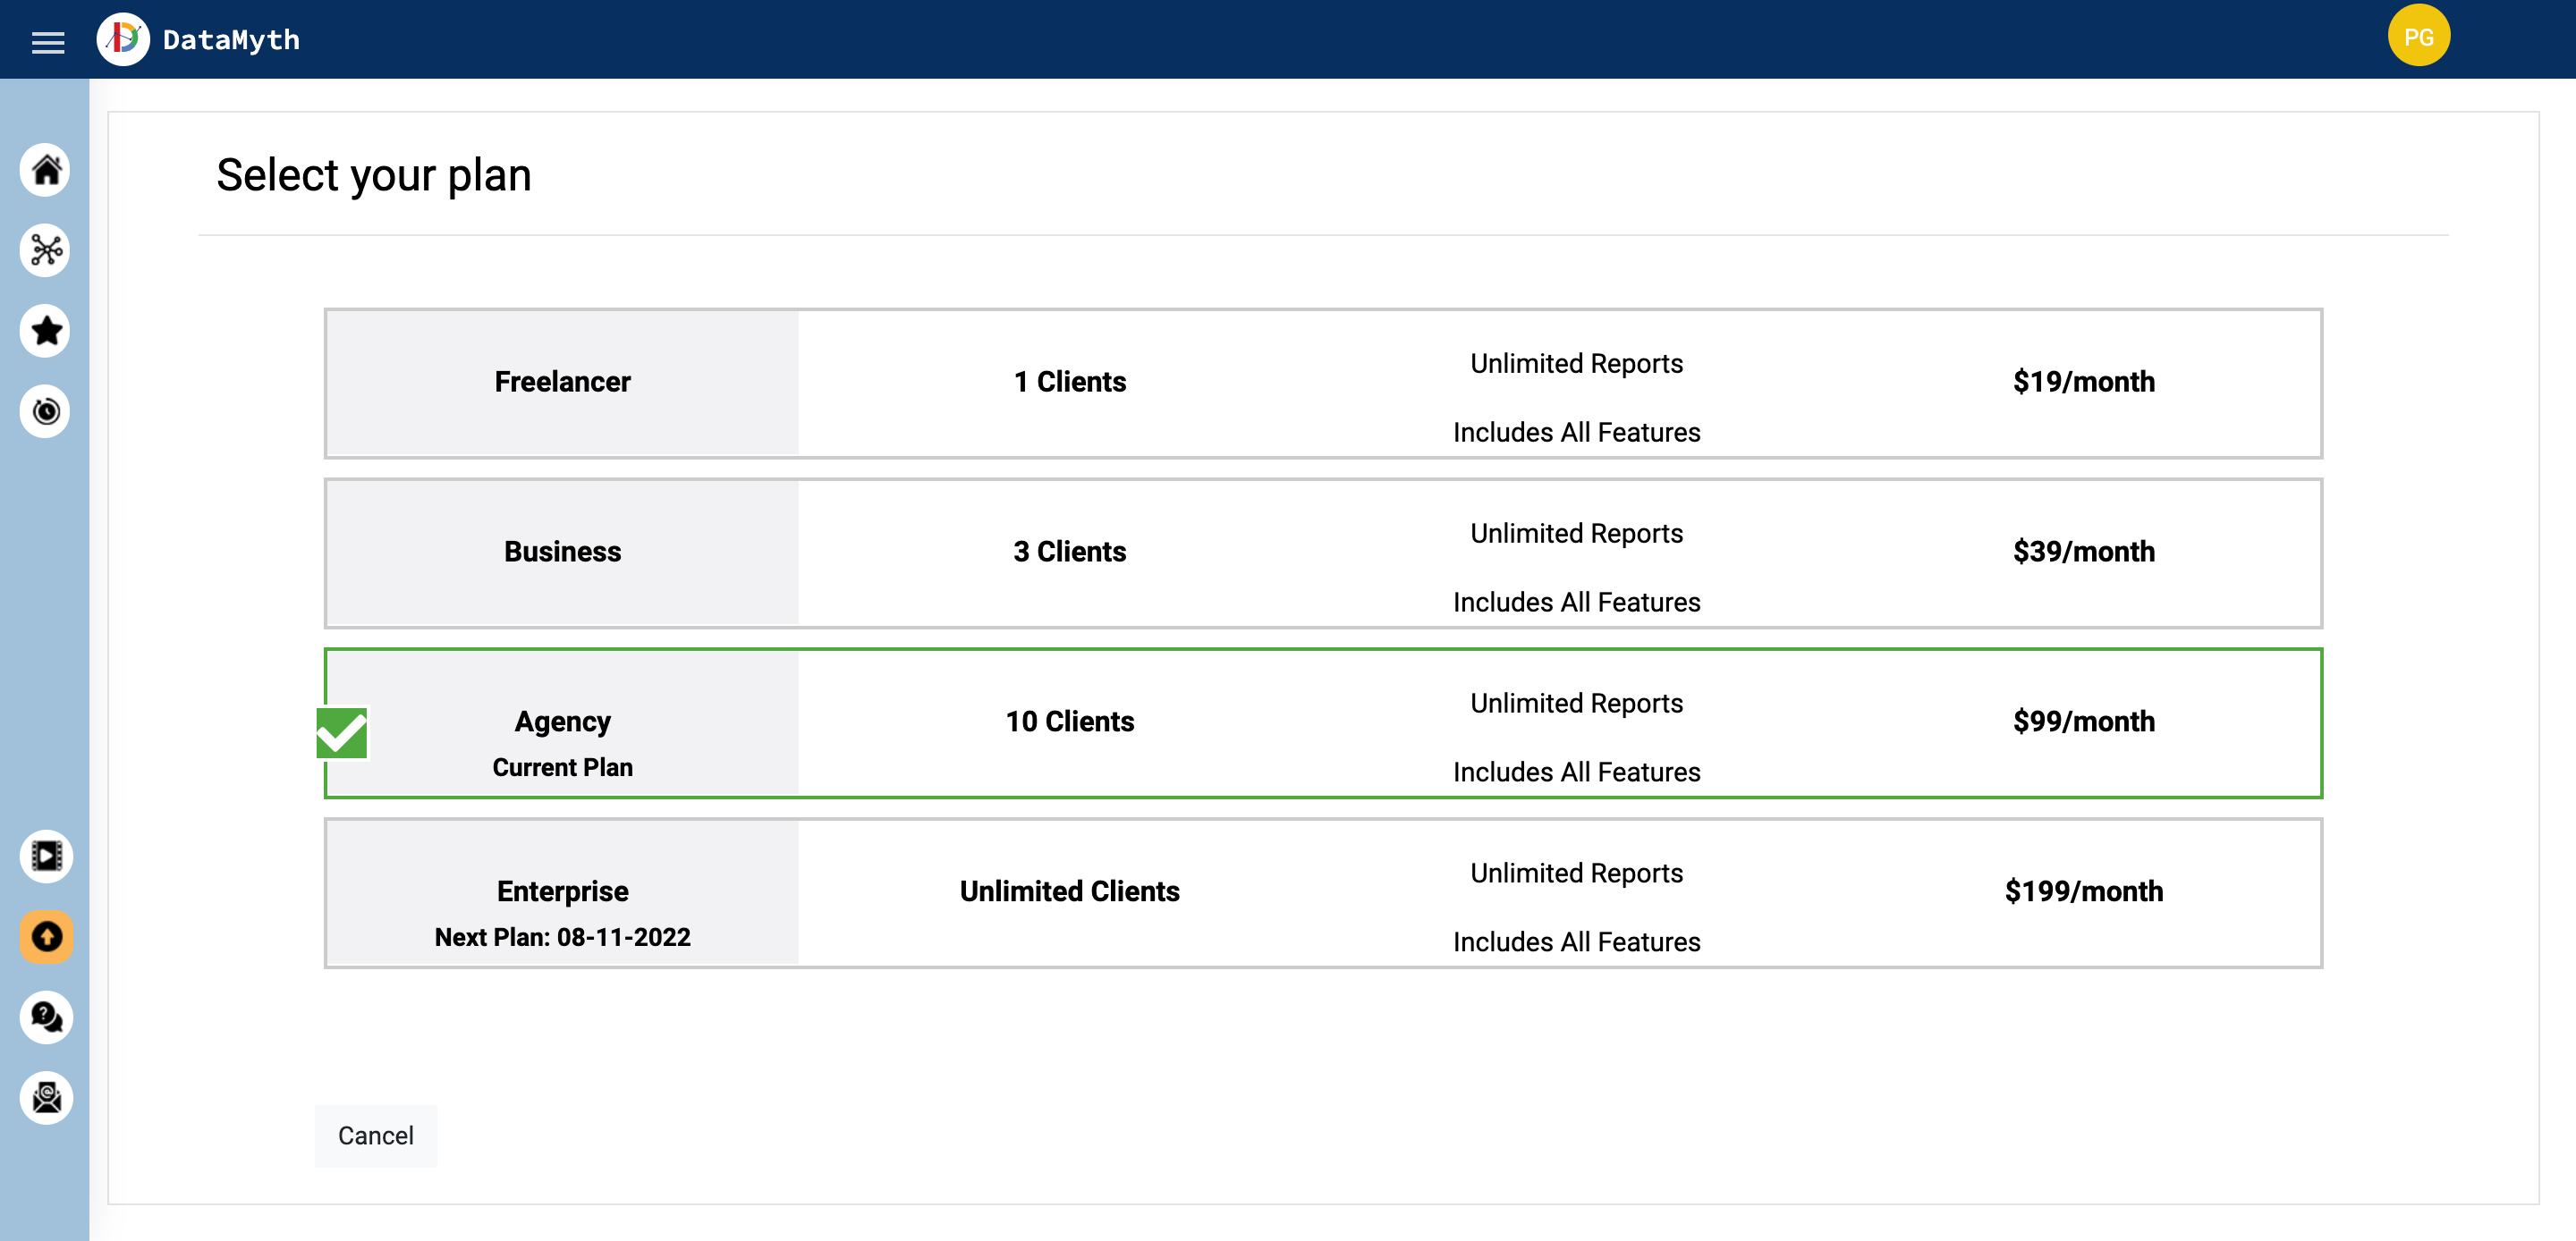
- If you are a paid user, you will see all the plans available, with your current plan highlighted.

- To update your plan, you can click the new plan that suits your need, and hit the ‘Confirm’ button on the bottom right corner.
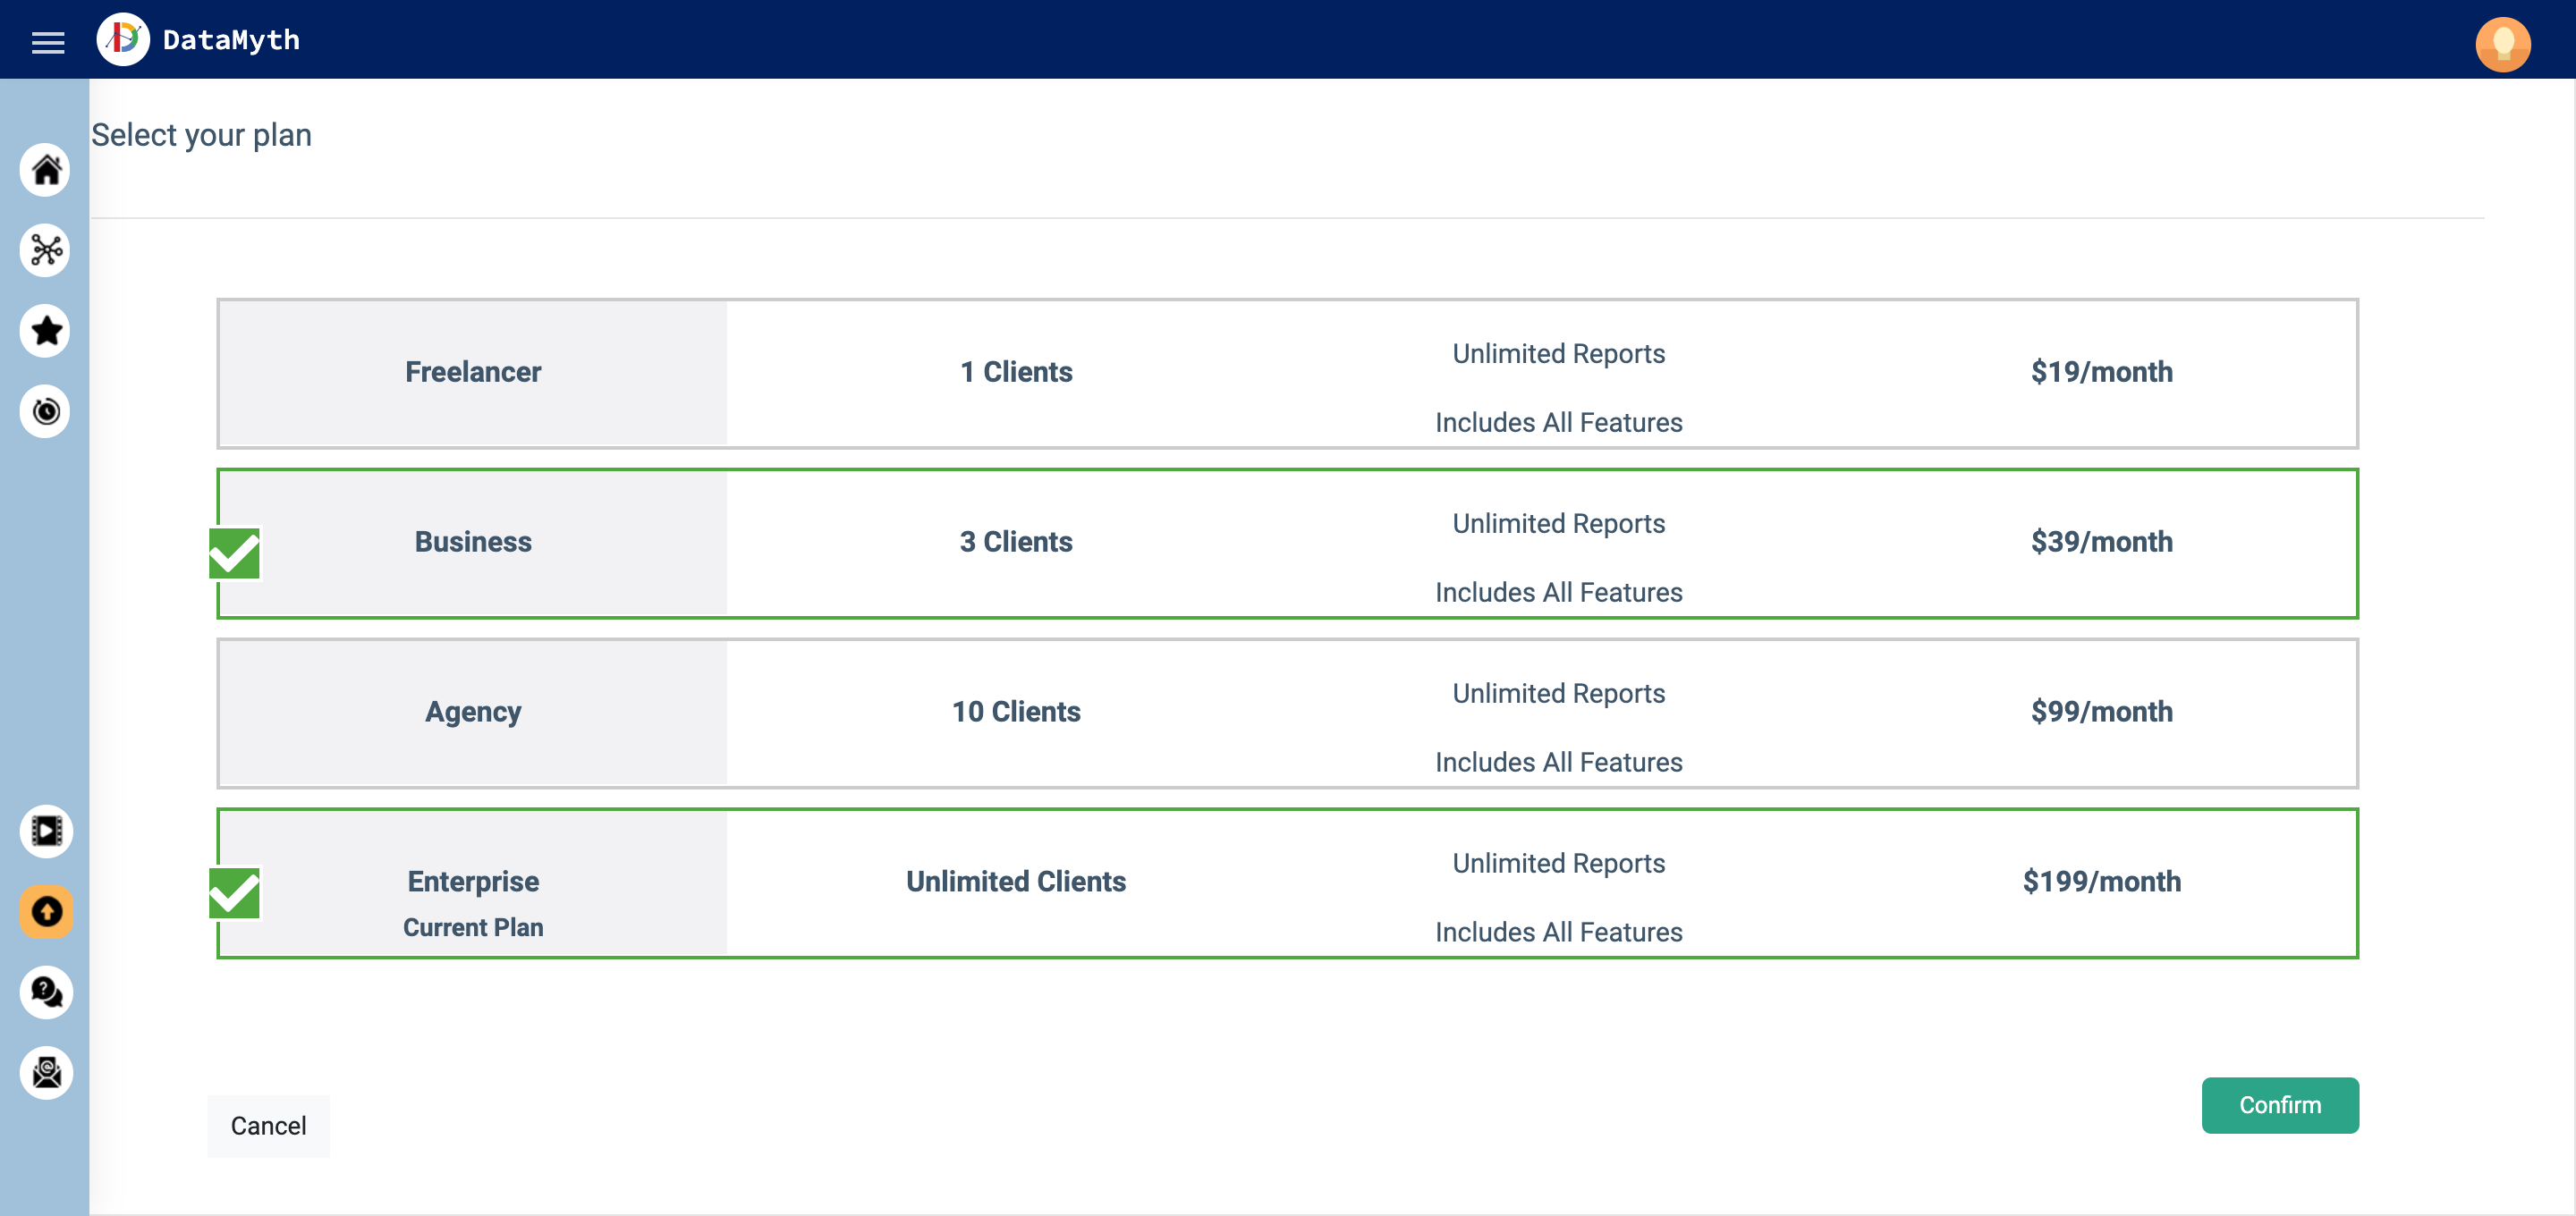
- A pop-up will appear with details about the new plan.

- Click confirm, and your plan will reflect in the next billing cycle.
Report History
How to check your ‘Report History’?
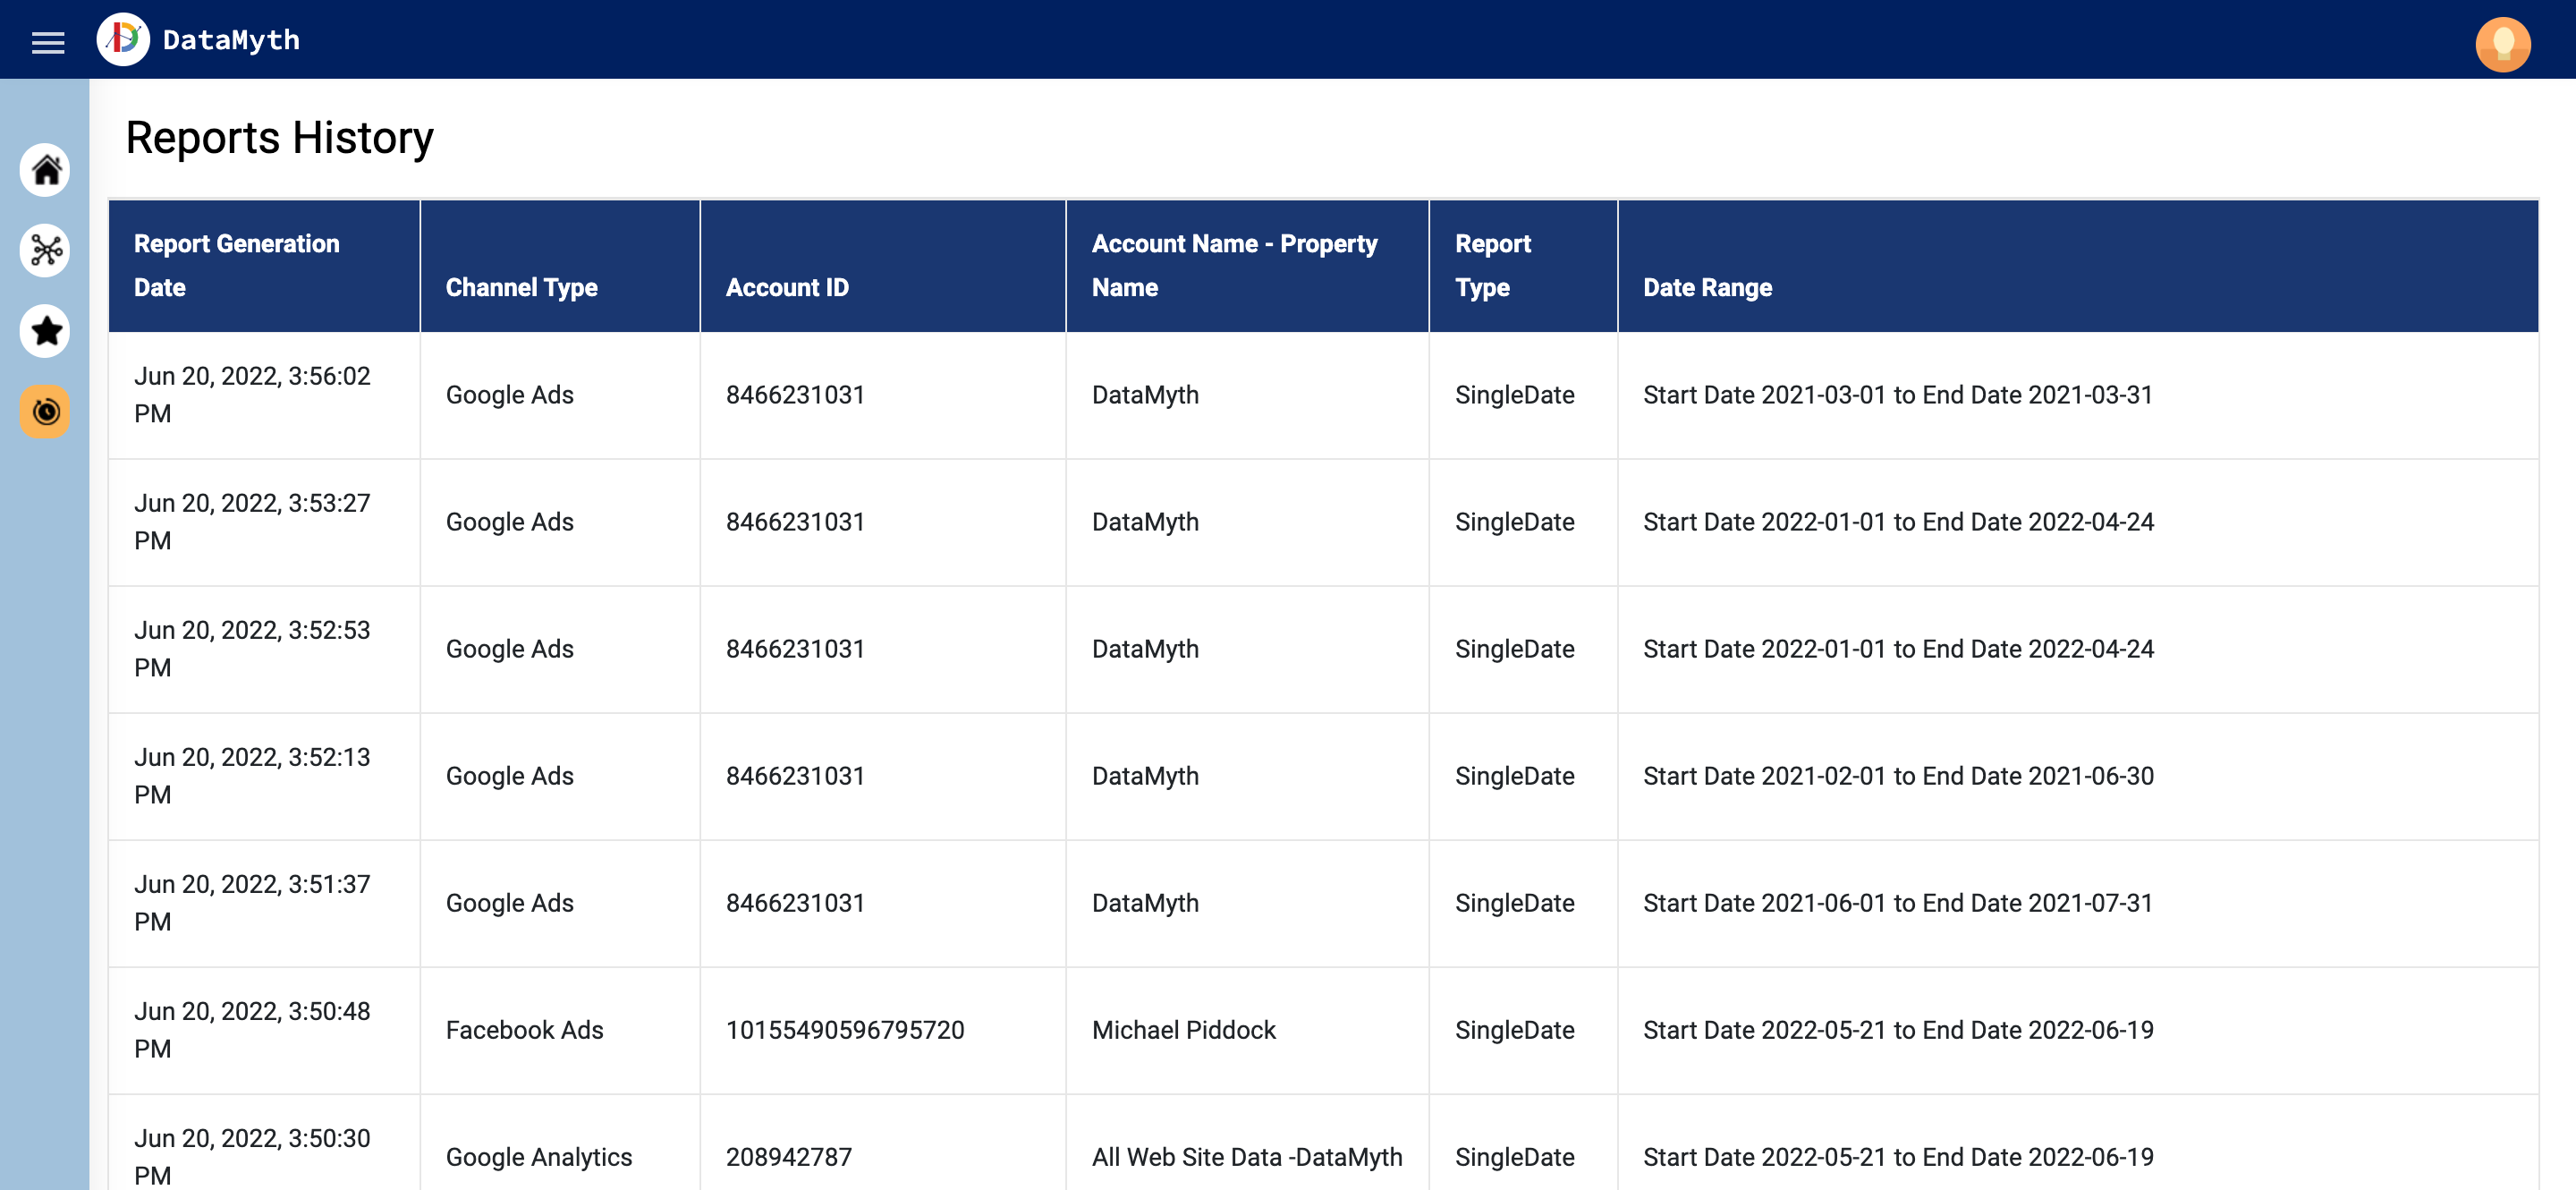
- From the home page, select ‘Report History’ on the left navigation menu.
- You will see all the reports that have been generated in the past and view details such as:
- Report generation date
- Channel
- Account ID
- Account Name
- Report Type
- Date Range
- While this section provides all the information around the reports run, you will not be able to re-run the reports as we do not store any of your data.
Cancel Subscription
How to ‘Cancel your Subscription’?
- To cancel your subscription, go to the ‘My Account’ page by clicking on your name initials on the top right corner, and click ‘My Account’ on the popup.

- Click ‘Cancel Subscription’ in the ‘Profile’ section. You will get a pop-up asking for confirmation.
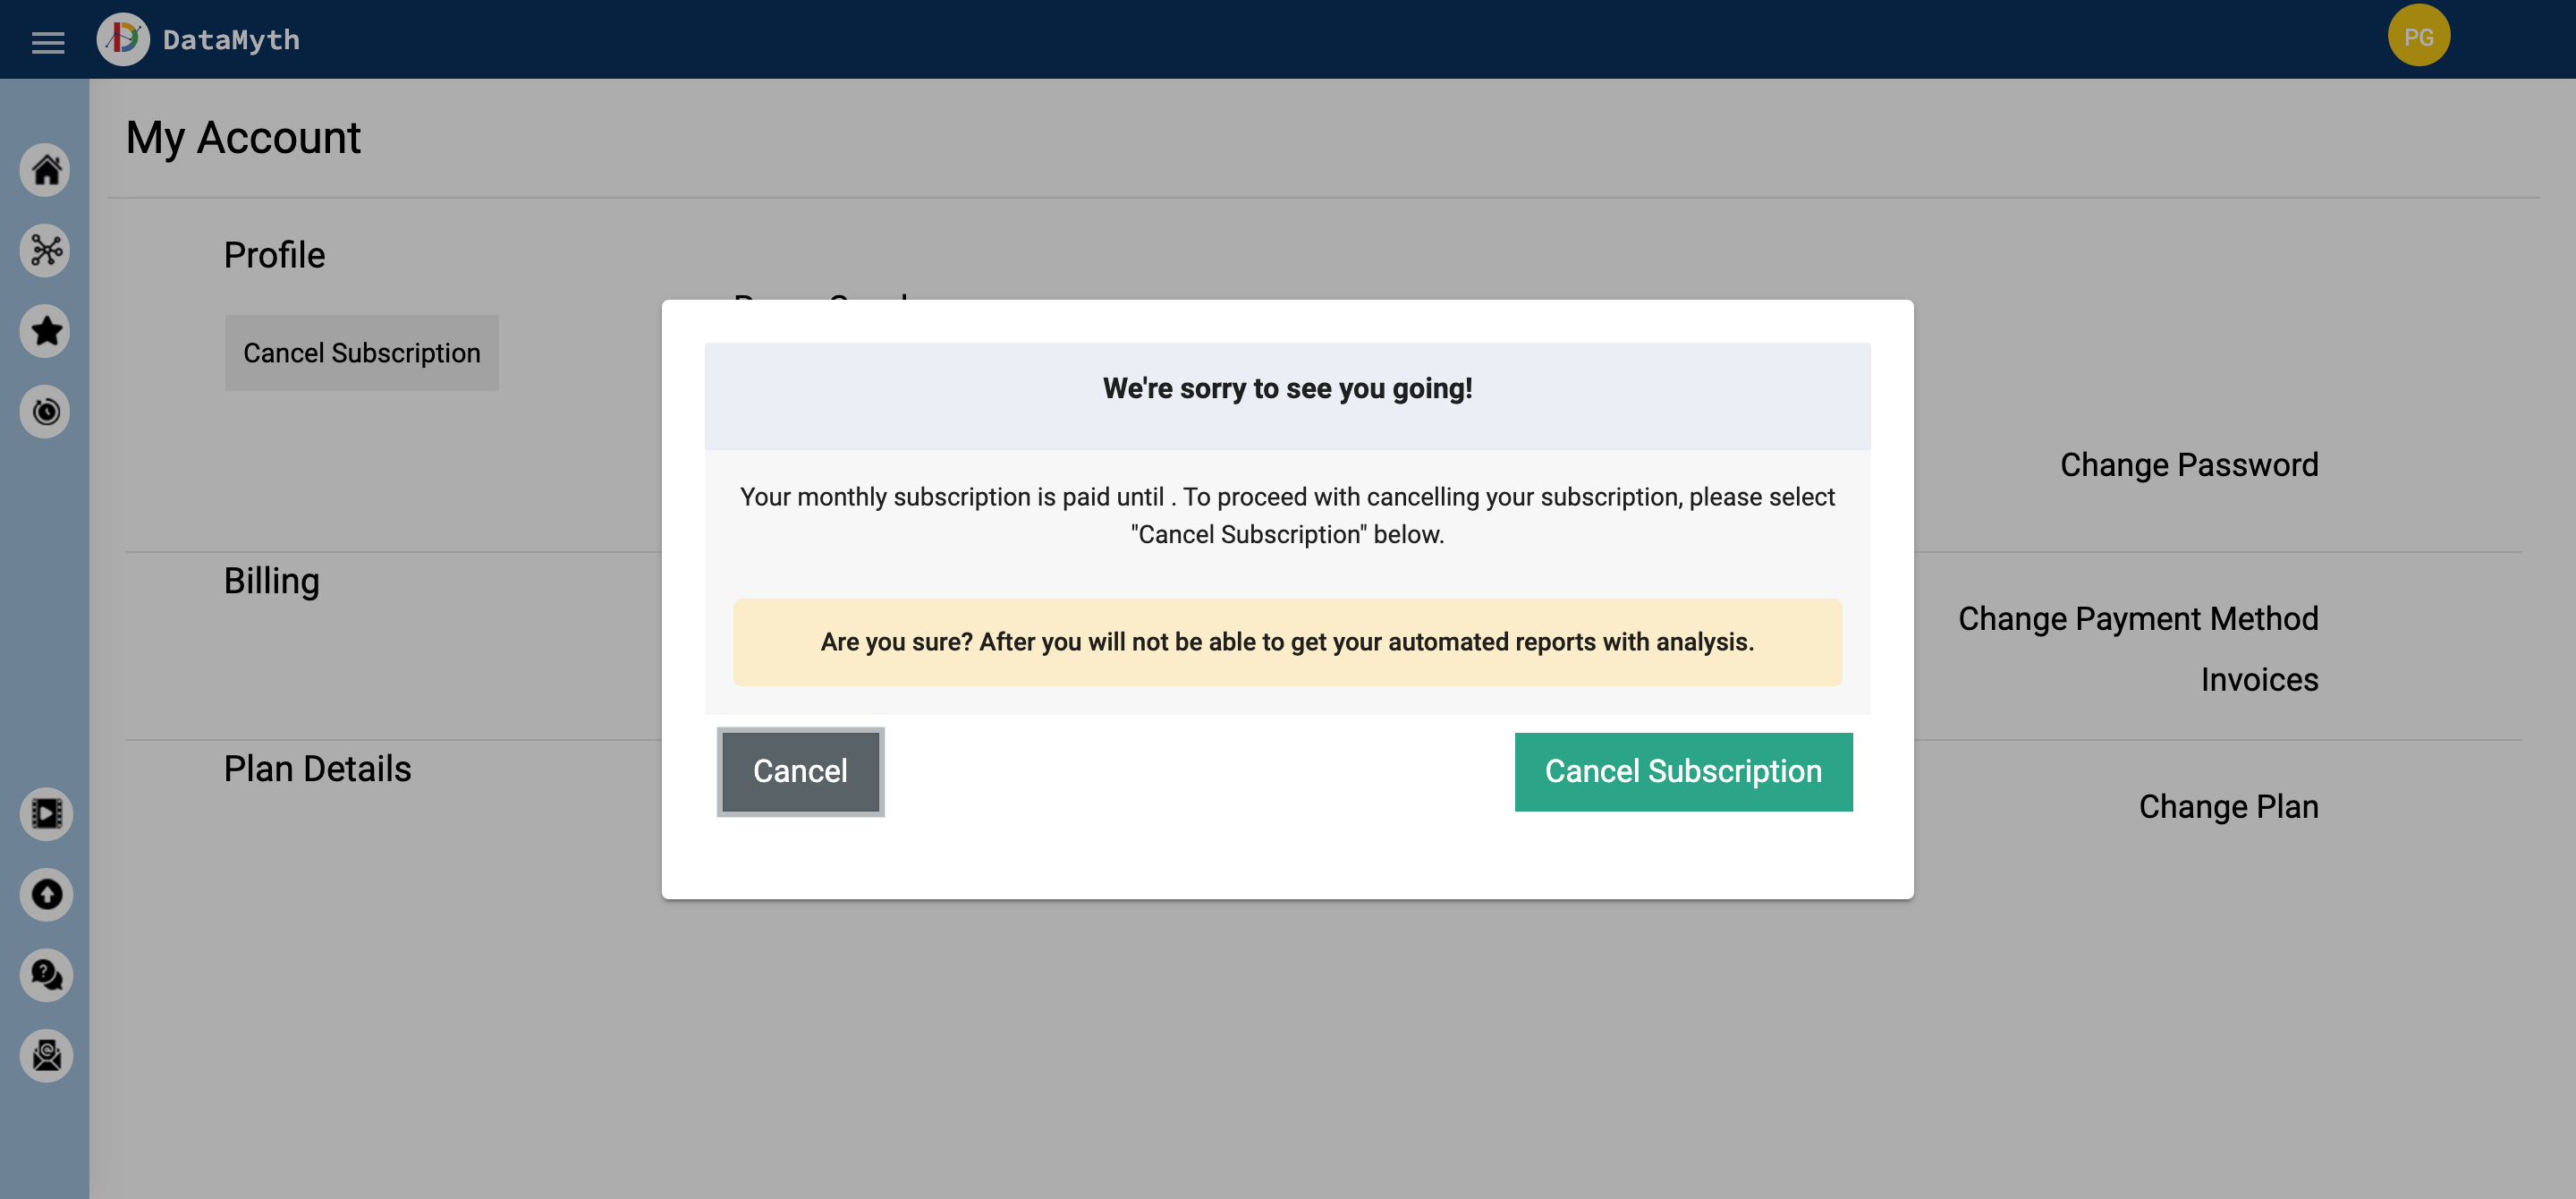
- Click “Cancel Subscription” in the pop-up to permanently cancel your monthly subscription with DataMyth.

 The next step is to add your client channels. On the ‘Add Data Source’ page, you will see the list of channels you can connect with DataMyth. Click the ‘Connect’ button next to the channel you would like to connect.


